How to Podcast
After sinking what must be hundreds of hours into podcast production, I think I can give a few pointers for podcasters looking to improve their sound and/or workflow. This is probably a little heavy for beginners. But maybe also just something to come back to :)
I record a podcast with a friend, in a room of my flat. My setup and preferences are derived from that, so ymmv as they say.
Disclaimer: Since I’m not a pro, take all of this with a grain of salt. If you’re a pro or have more insight into a specific aspect, I’d be more than appreciative if you contacted me for corrections, hints etc.
I’m gonna go through all the different areas (which is probably a bad idea). I’m gonna do my very best to:
- describe why a certain aspect is important,
- show/explain how I deal with it, and then
- link the best resources on it
Index
- Introduction
- Audio Chain
- How to Record
- Microphones
- Other Hardware
- Software
- Editing
- Mixing
- Loudness Standards
- Exporting
- Hosting
- Live signal processing with a dbx 286
- More Resources
- Thanks
- My Podcast
Audio Chain
For all of the following to make more sense, let’s do a little ground work. The journey the sound takes goes something like this: The podcaster’s voice is going into a microphone. That signal needs to get amplified. This might happen in an interface (in its microphone preamps). The signal then goes into a PC where some recording software – DAW (Digital Audio Workstation) – picks it up. Then some post processing happens, maybe some cutting, a file is exported… and a podcast episode is born!
There are many variations to this. But essentially, that’s it.
How to Record
Quality
Long story short: I record 24 bit. 16 bit are probably enough though, Paul argues. In my humble opinion: If this is what you’re arguing over, a) your podcast sounds perfect or b) there’s bigger fish to fry. Don’t worry about it for now, I’ll come back to it later. And the Hz? To my knowledge, there is no practical benefit to recording more than 44,1kHz.
Levels
Before considering gear, let’s take a moment and think about what the goal is in the recording stage. Compared to everything there’s to think about later, it’s fairly straightforward.
You want to capture the spoken words in the best way possible
Best way possible in recording terms means as loud as possible, but not too loud. Okay. too loud means clipping, which means distortion. Which you don’t want. Therefore, in order to protect against clipping, which means the signal exceedig 0dB, you need some headroom. -6 to -12 dBFS as maximum signal level is recommended. Wikipedia explains what dBFS means. My understanding: It specifies the digital range of levels.
Since every speaker (and every microphone) is different, this of course means that there’s just no way to figure it out in advance. A good way is to just have every speaker talk for a bit. What I imagine must be hardest for non-pros is to be careful enough. I bet the more professional you are, the more you keep the level on the quiet side.
Two factors: People tend to get more excited during a conversation than during test sentences. And: clipping is worse than a recording that’s too silent.
The sad news here is also good news: There’s nothing like experience. And experience might come in the form of simply more and more recordings with the same speakers. If you’re recording the same group of people, just iterate: Write down the levels you set, and after the recording check the files and look at the max levels with some kind of meter. You’re looking for the “True Peak” reading. Let’s worry later about what exactly this means.
If you notice clipping during the recording (usually a red light on whatever recording device you’re using) save the current recording and reduce the levels.

Some risky peaks
This is “a little hot”, as the pros say (I think). -5 is just okay, but -2,5 is pushing your luck. But, good news: This is not a failed recording by any means.
I’m not giving the recording levels I use, because they’re meaningless for everybody but me in my exact recording setup. But: Depending on the type of microphone you use, the right setting might be 90-95 or even 100% of gain, so don’t be afraid to go there.
This is mostly derived from this article: Noterepeat.com: Gain Staging 101 – How to get a clean loud signal.
Recording Space
Consider the room you want to record in. Think about a bathroom, or some noisy restaurant: The less fabric and the more hard surfaces there are, the more echo you’ll have. This is bad for podcasting. You don’t need to build a sound booth though, just consider some things and you’ll do fine. Ray talks about the room specifically in this video.
Microphone Technique
Know the instrument, love the instrument – and use it wisely
Take some time to consider how to speak into a microphone. It’s not as easy as it seems! And once it’s easy, it’s not easy to be really consistent.
I really like this post on transom.org. It says it’s about “plosives”, but covers a lot of ground.
There’s also this lovely video (quoted above):
My takeaways:
- Get as close to the microphone as you can without introducing breathing noises or heavy bass from the proximity effect
- Generally, putting the microphone slightly off-axis helps with plosives (the post on transom.org explains what I’m talking about)
- Don’t vary distance or position of the microphone relative to your mouth throughout the recording. You’ll have enough variation in volume to deal with simply from being more or less excited while talking.
- The previous doesn’t apply if you laugh loudly, or scream: For these instances, try to train yourself to increase distance to the microphone so that the recording doesn’t clip. It’ll absolutely still come across in the recording, don’t worry.
Headphones (for monitoring and editing)
While you record, you should monitor what you’re capturing. It could be argued that once the proper input gain is set, there’s no need for that – but you’re on the other side of that argument once you discover that you’ve captured a high pitched noise with your signal in that otherwise exquisite one-hour conversation.
For checking what you’re recording, honestly any pair of headphones works as long as it’s not letting through too much sound. But you need monitoring headphones anyway, for editing.
What is different about monitors compared to “regular” headphones? Well, monitors are meant to be neutral, not color the sound themselves. If you like all of your music with some extra bass, you dial that in on your receiver’s EQ. But imagine an audio engineer would do the same while mixing/mastering. Everybody but her would receive an end product mixed with too little bass.
This goes into mixing and mastering as well, but this much I’ll say here: Remember that you’re producing your podcast to be listened to in any situation. Over a car stereo, through earbuds on a train, through a smartphone speaker turned up all the way, anything. You can – and should – still make decisions on what your podcast should sound like, absolutely! But those can’t be based upon one level of indirection – namely your favorite headphones for listening to EDM.
I went with the widely recommended Sony MDR-7506 and haven’t regrettet that decision. Maybe one thing: The coating of the ear cushions “dissolved” after some time. Other than that they’re solid. I’ve had them for years, haven’t treated them carefully, and they show no sign of wear.
Microphones
Aaaaah, microphones. The never ending topic. Good news: It’s not as complicated as you might think from all the talk. Marco’s guide is the best place to start.
There are two basic types of microphones, condenser and dynamic microphones, and it’s good to know the basics. Others have written everything there is to write about this and how it’s relevant for podcasters: Marco’s take is as good as any. Both dynamic and condenser Microphones come in the USB and the XLR variety, Marco also writes about this.
Quite some time ago I made a little video in which I recommended the Blue Yeti. It’s quite popular (the Yeti, not my video), and it’s the Wirecutter pick (for USB microphones).
But: I was wrong. It has nice sound (because it’s a large diaphragm condenser microphone). But if you’re not in a studio or don’t want to build a pillow fort every time you’re recording, rejection of room noise and echo becomes an important quality in a microphone.
XLR
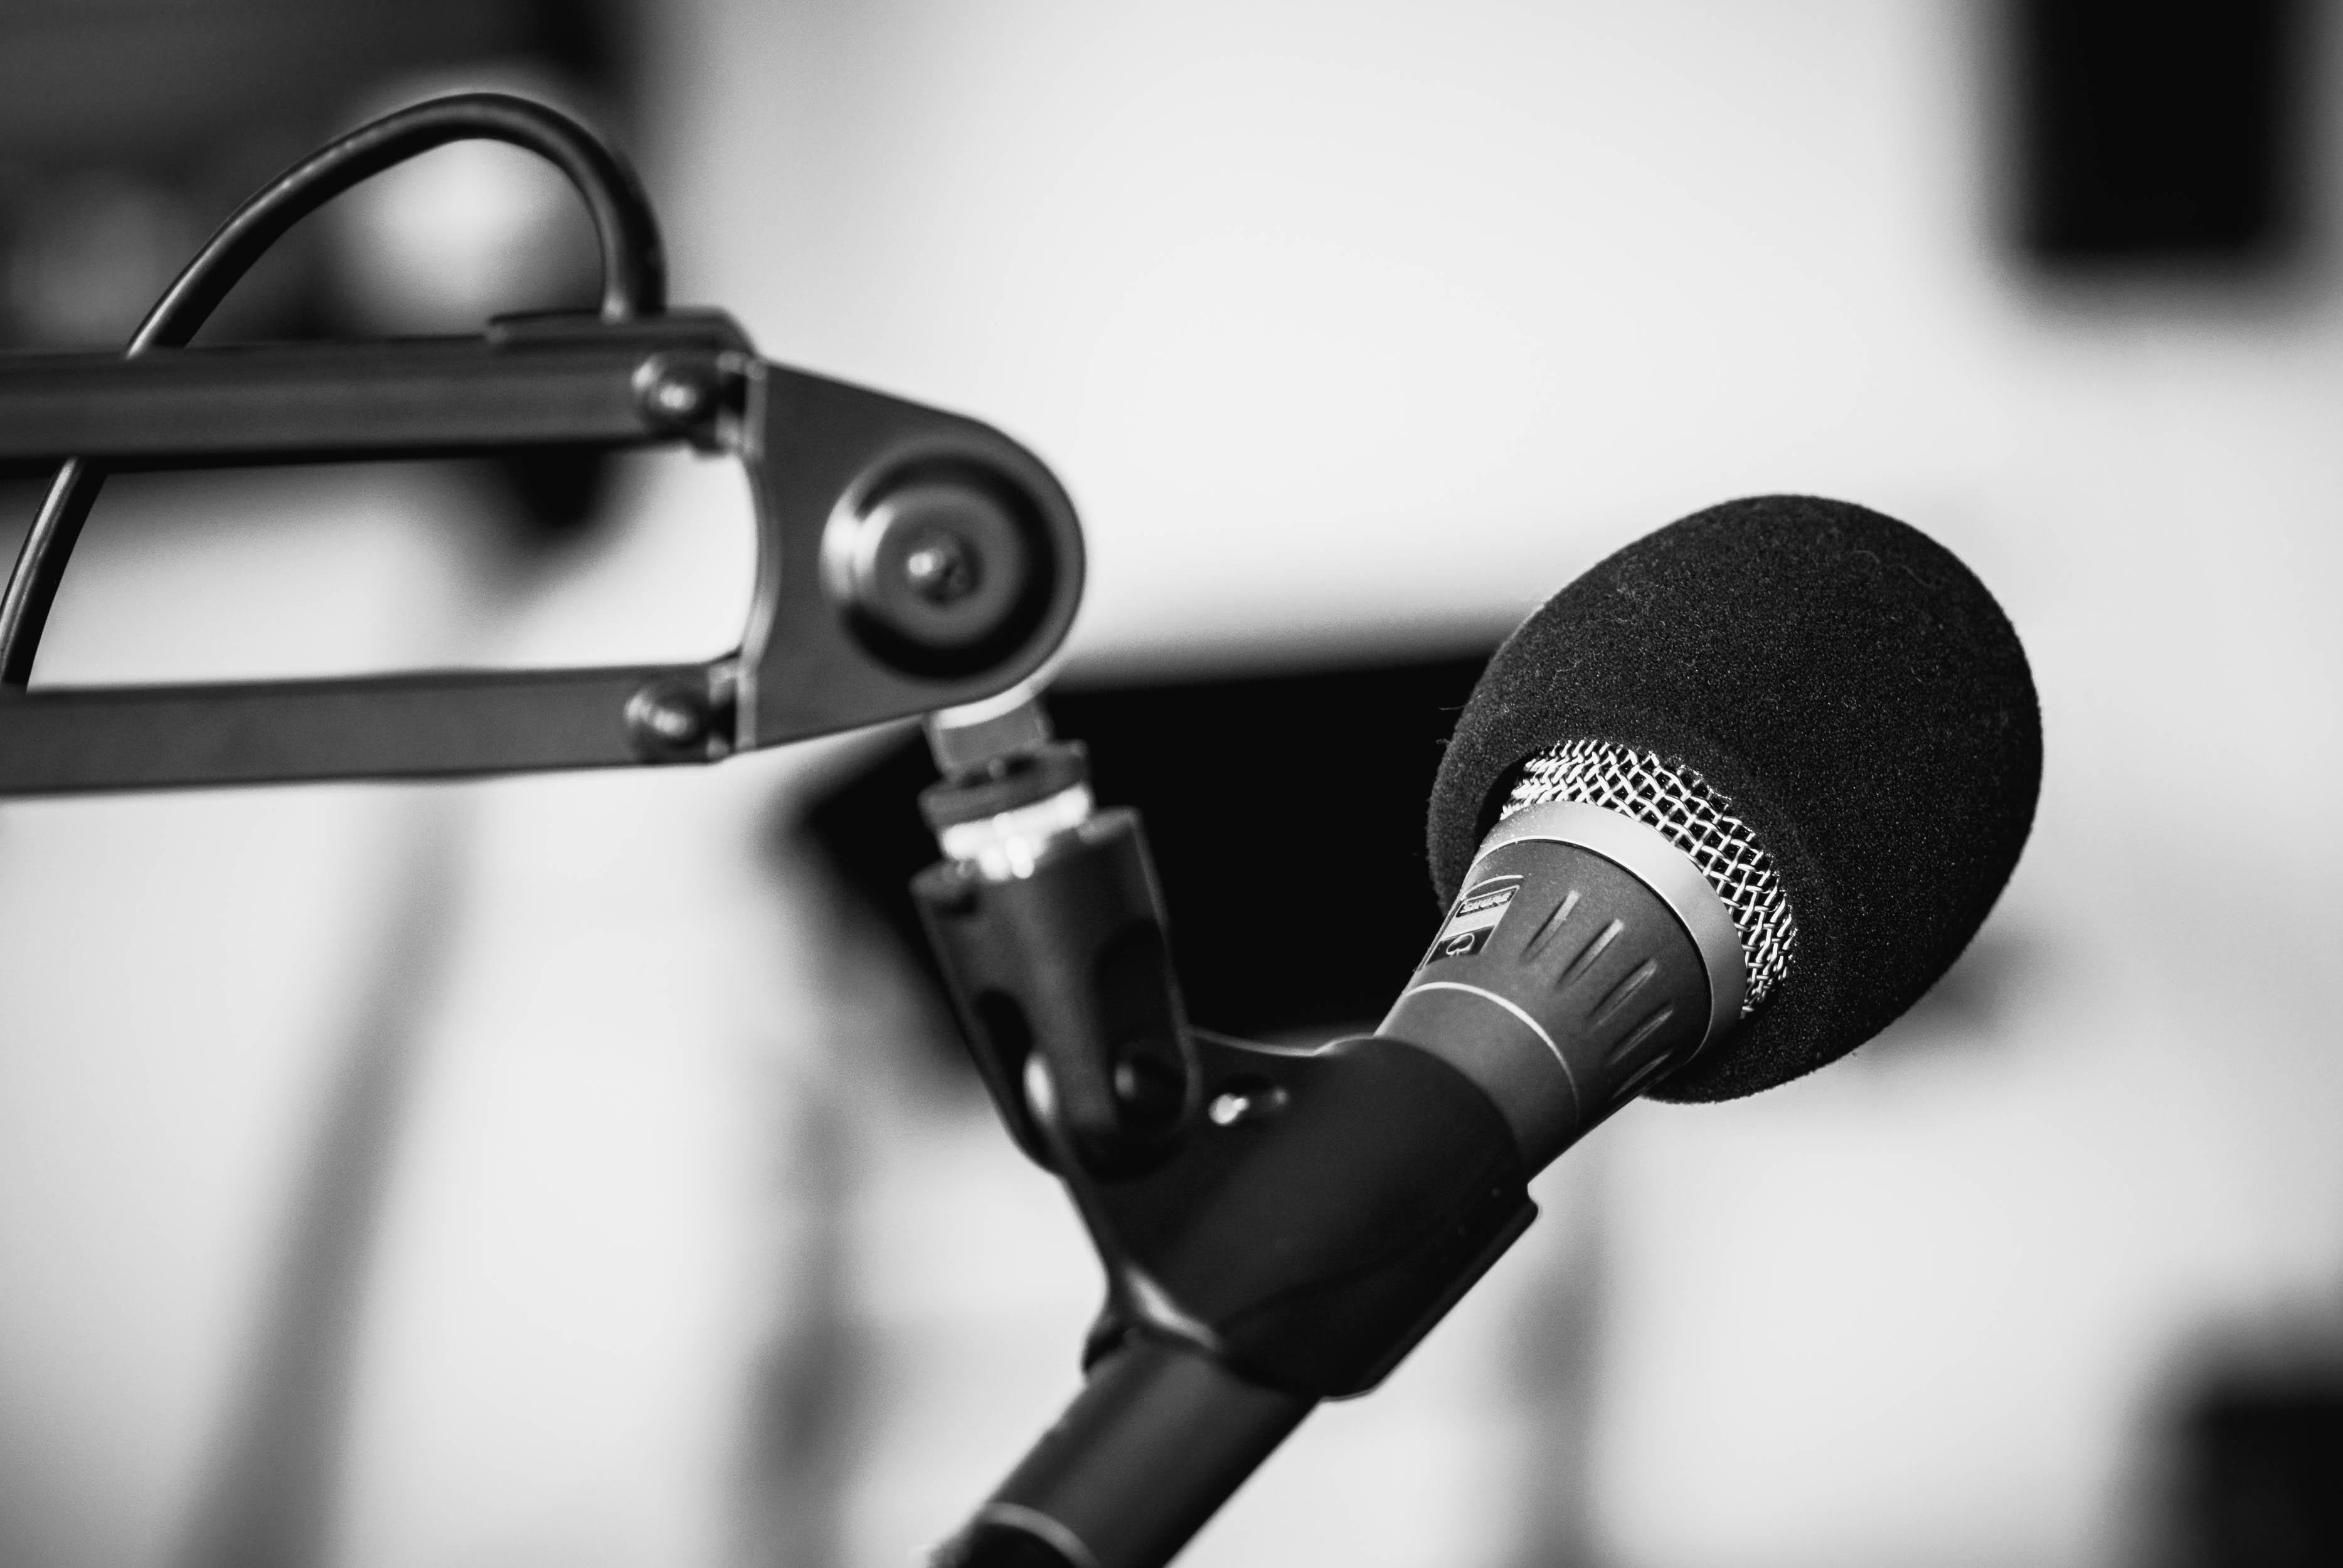
The Shure SM58 is a solid microphone for podcasting. It doesn’t sound as clear as the Blue Yeti, but it makes recording two people in one room feasible with minimum effort. And it sounds absolutely more than “good enough”.
Only bad thing: It does need quite a bit of gain, so it should be paired with an at least “okay” microphone preamp (either extra, or built into an interface or recorder, more on that later). For 100€ new, and 50-60€ used, you can’t go wrong. Beware of fakes, though.
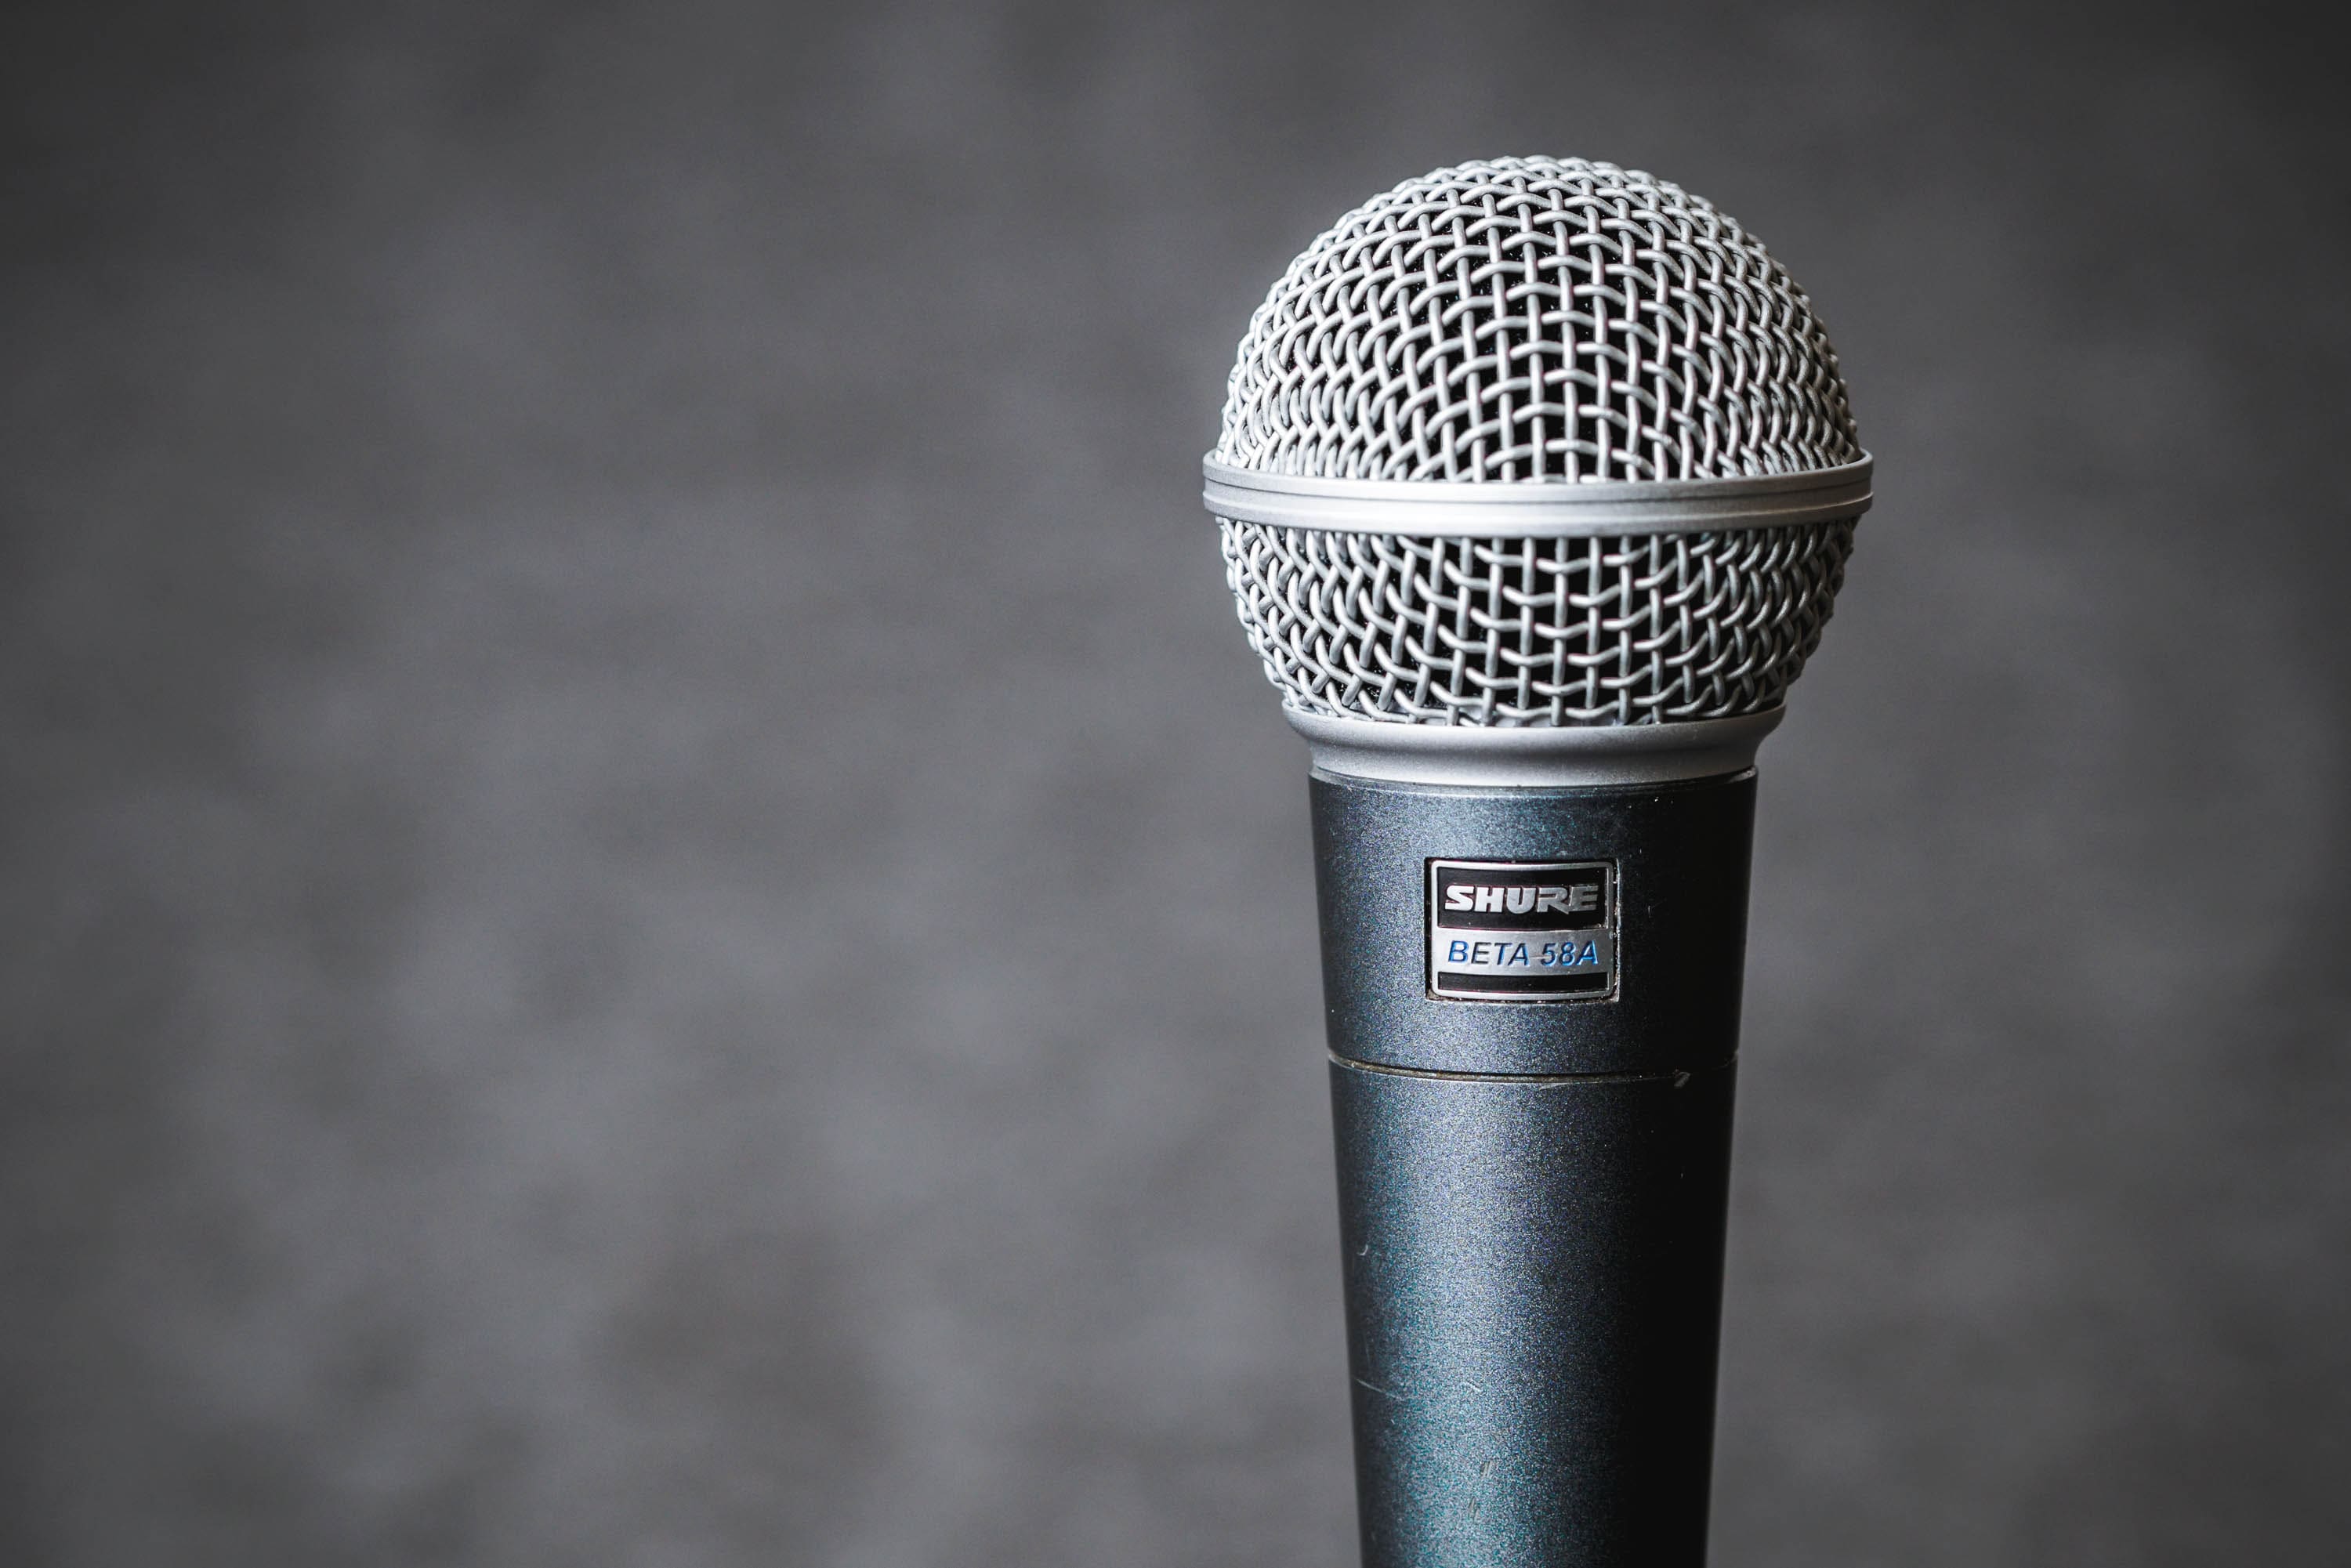
The Shure Beta 58A is an “updated” SM58, and hence also solid. Beware: It’s not necessarily better than the SM58. Depending on voice and microphone technique of the speaker, the sound characteristics (more high end) and more directional pickup pattern may or may not be an advantage.
I mainly tried the Beta 58A because it offers more gain than the SM58, about 4 dB – what I didn’t know was that the signal-to-noise-ratio is the same as the SM58’s. So the noise got louder with the signal. I still like the Beta 58A for my voice, though. For 175€ new, and 80-140€ used, it can absolutely be worth it. Beware of fakes as well!
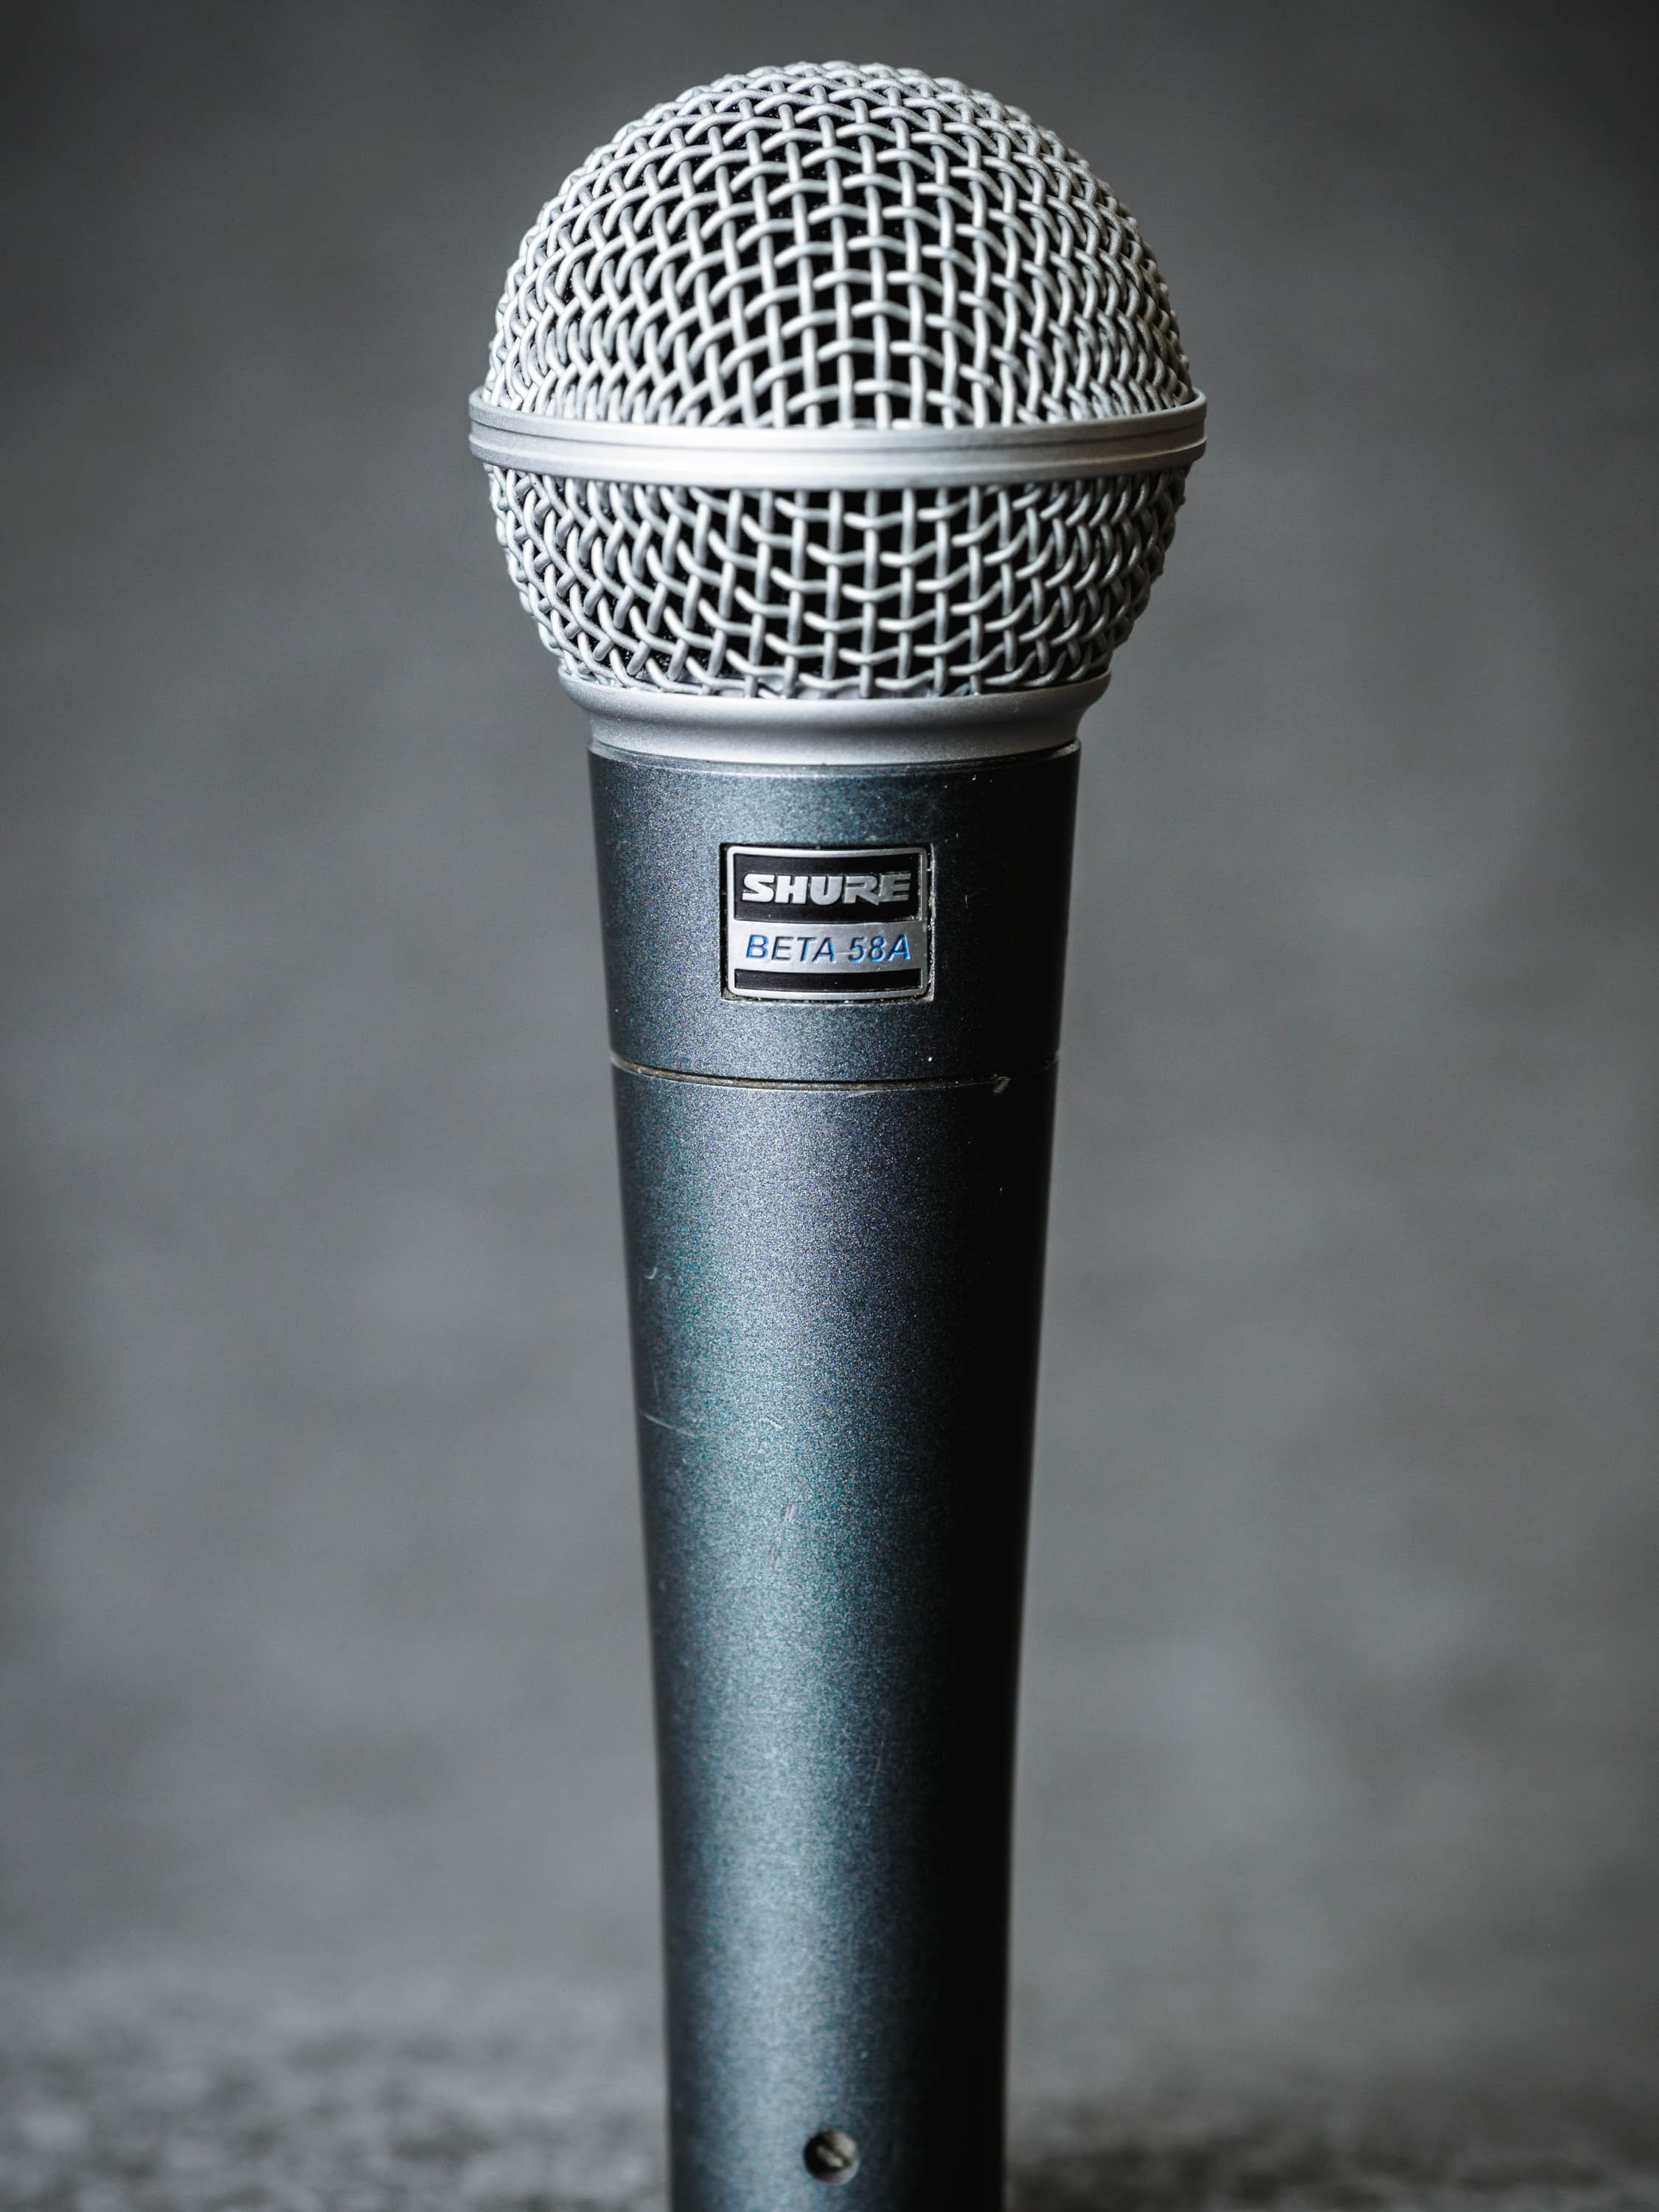
Shure Beta 58A – mine lacks the trademark blue rubber ring on the cage
Right now I’m using the Shure Beta 87A, which is a condenser microphone – pause for effect – but allegedly with the good characteristics of a dynamic microphone! This I can corroborate. The rejection is great. When you turn your head, the drop in volume is tremendous, which also means less opportunity for nasty room echo to get in there.
I wasn’t immediately impressed by the sound quality. I guess I expected Blue Yeti-level clarity which the 87A probably can’t deliver because it’s a small condenser(?). But it does sound “nicer” than the 58s.
What I found curious is that it also needs almost as much gain as the dynamic microphones. Overall, I’m not totally overwhelmed by the Beta 87A, but still think I’ll keep it. Or at least use it for some time to really get used to it. For 300€ new and about 220€ used, this is not a win as clear-cut as I’d like it to be.
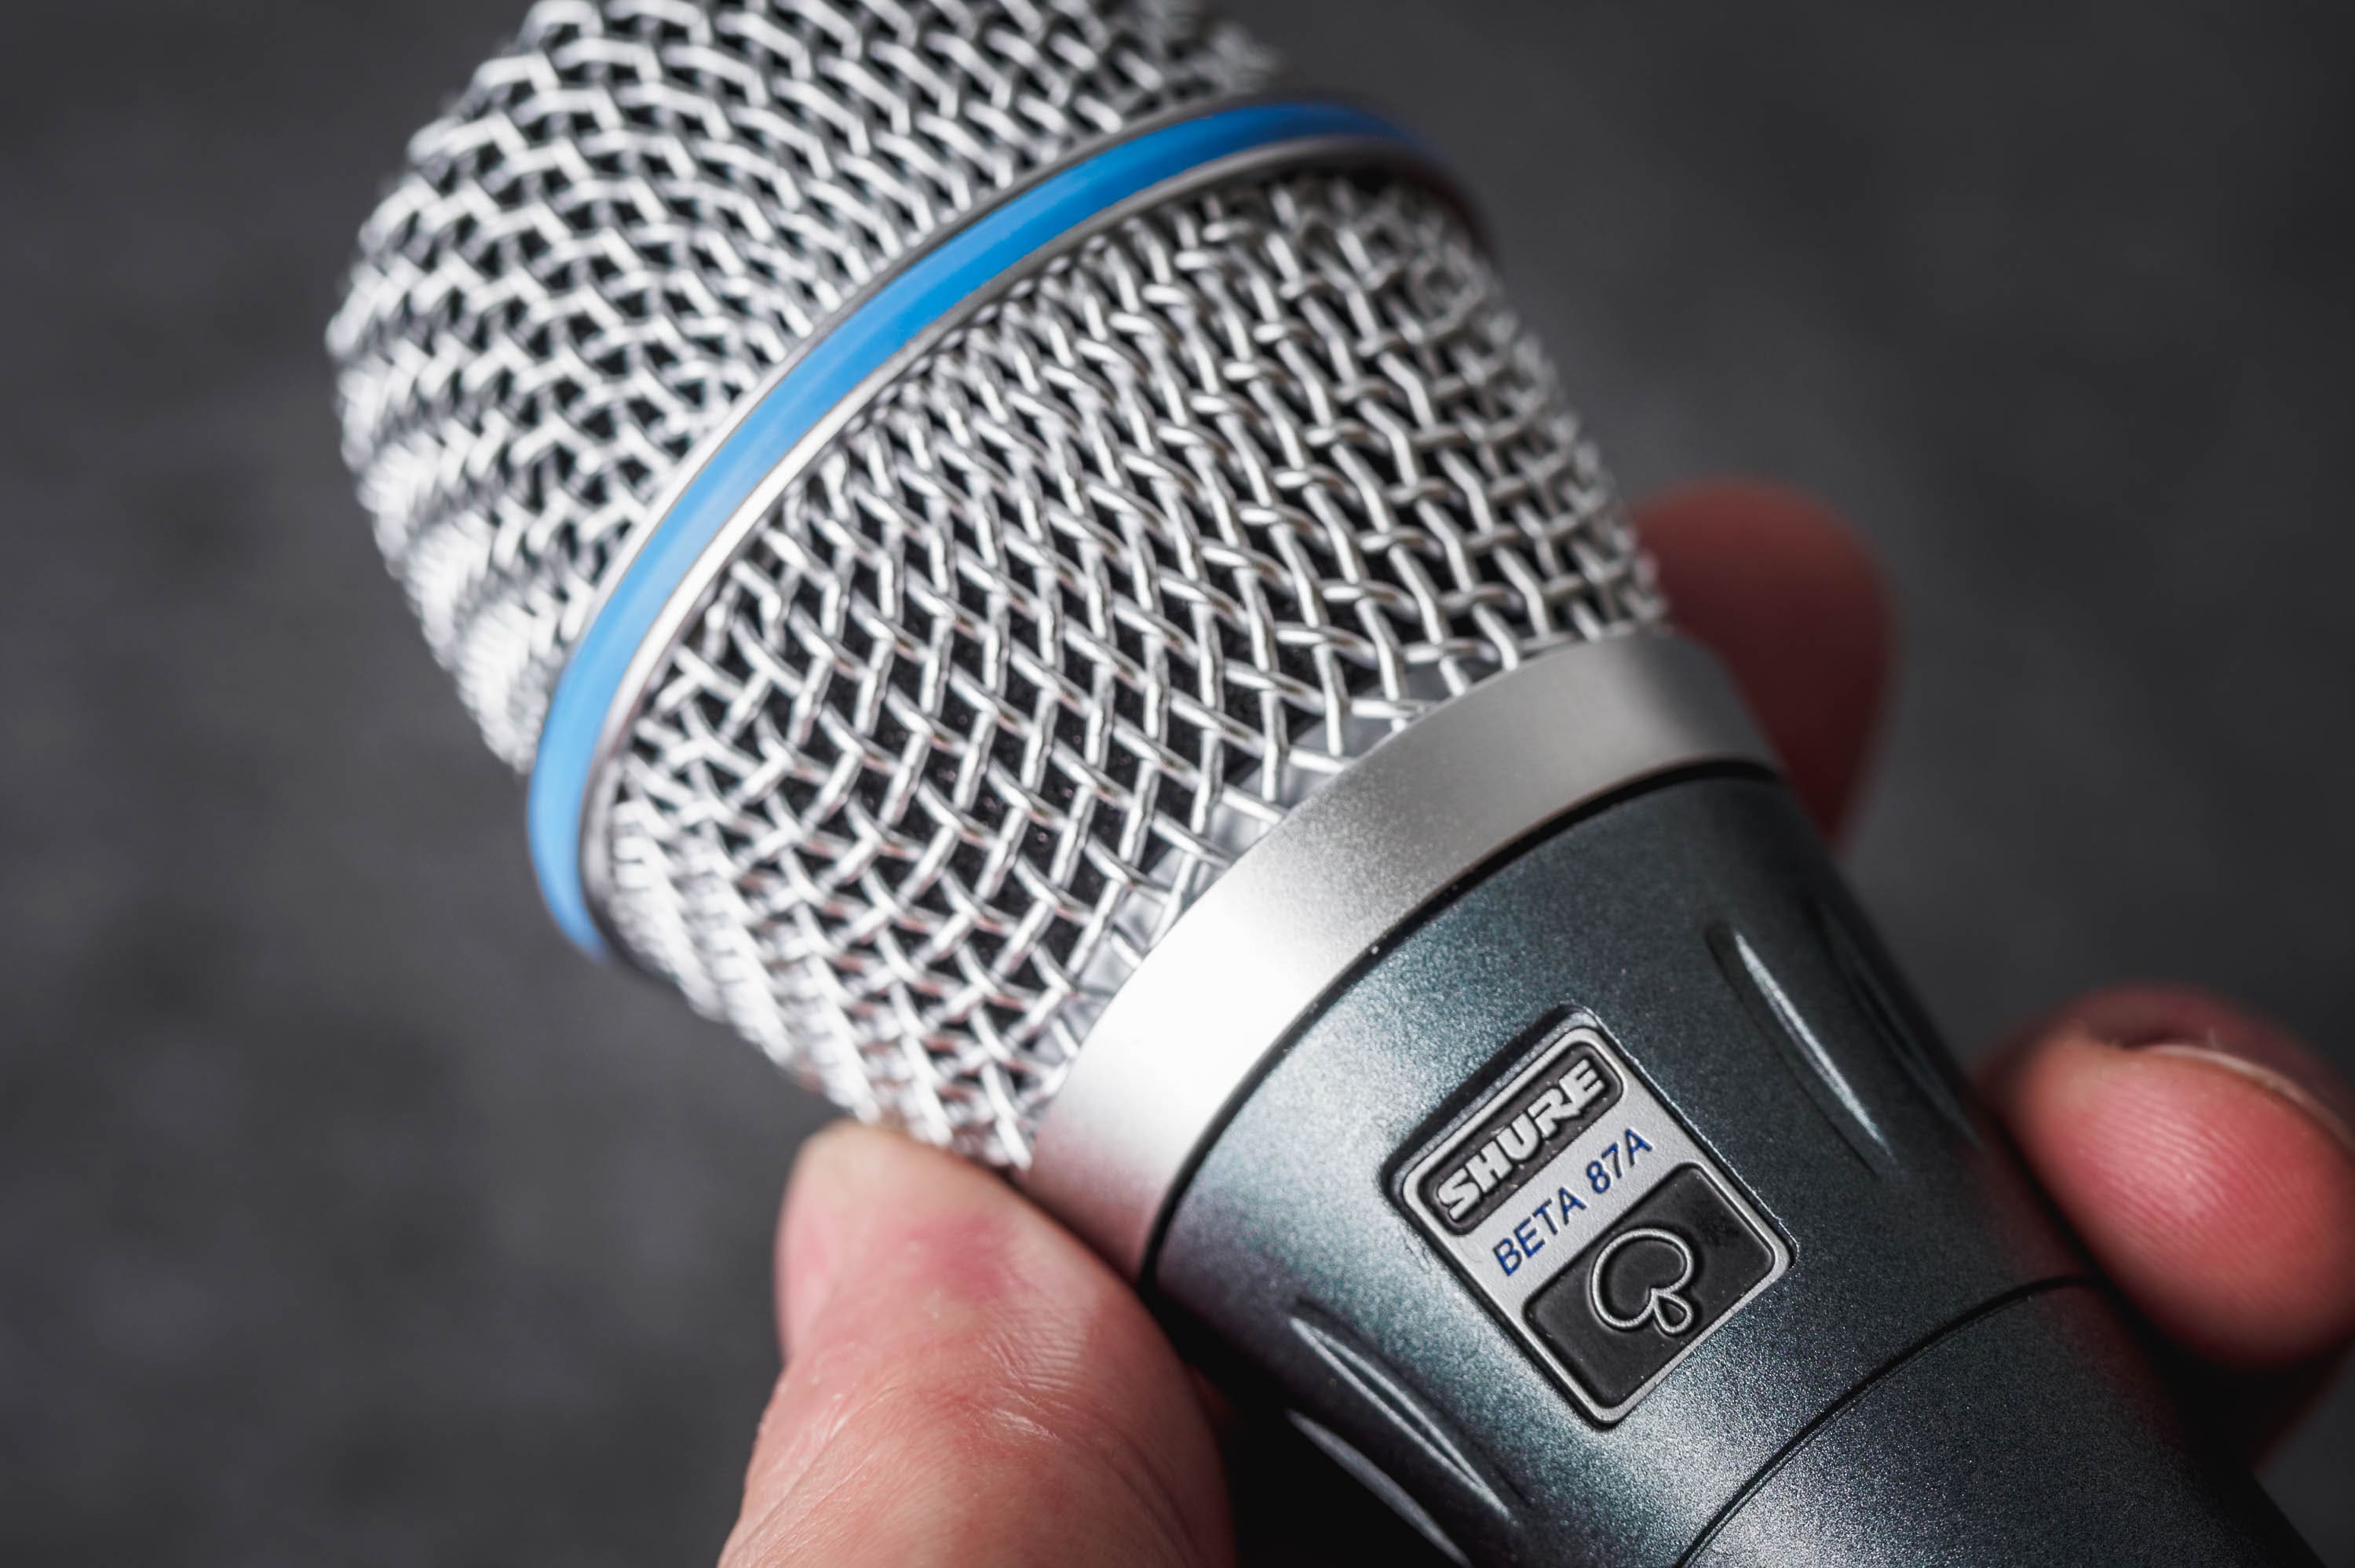
Shure Beta 87A
USB
If an USB microphone is for you and you’re in the US, the Audio Technica ATR 2100 seems to be a tremendous pick as well as a great value. In Europe, you can’t get it. But it’s supposed to be the same as the EU-available Samson Q2U.
I have no experience with these microphones, so I can’t speak to them. And with the EU version, the deal isn’t quite as great.
Other Hardware
Digital Recorder
The sound has to be recorded onto something. This is either your PC, or a digital recorder. Let’s focus on digital recorders. They’re great. With a digital recorder, your podcast setup can become mobile!
Besides usability and some ruggedness, for podcasters the most important property is how much noise the preamps generate. Especially if you use a dynamic microphone microphone, there can be significant noise introduced with all the gain that is needed.
In podcaster circles, people recommend the Zoom H6 oder Zoom H5. In my opinion, those are not suited for podcasters because there’s no real use for the built-in microphones. The budget that goes towards those can’t be spent on better internal preamps without having a more expensive product: The H5 is 280€, while my recommendation is 170€.
My recommendation, you ask? I like the Tascam DR-60D MkII. It has two XLR inputs, a built-in limiter (lessens the impact of clipping), quite okay preamps and is just solid. Don’t get confused by the labeling as a recorder for DSLR cameras. It’s all the same thing.
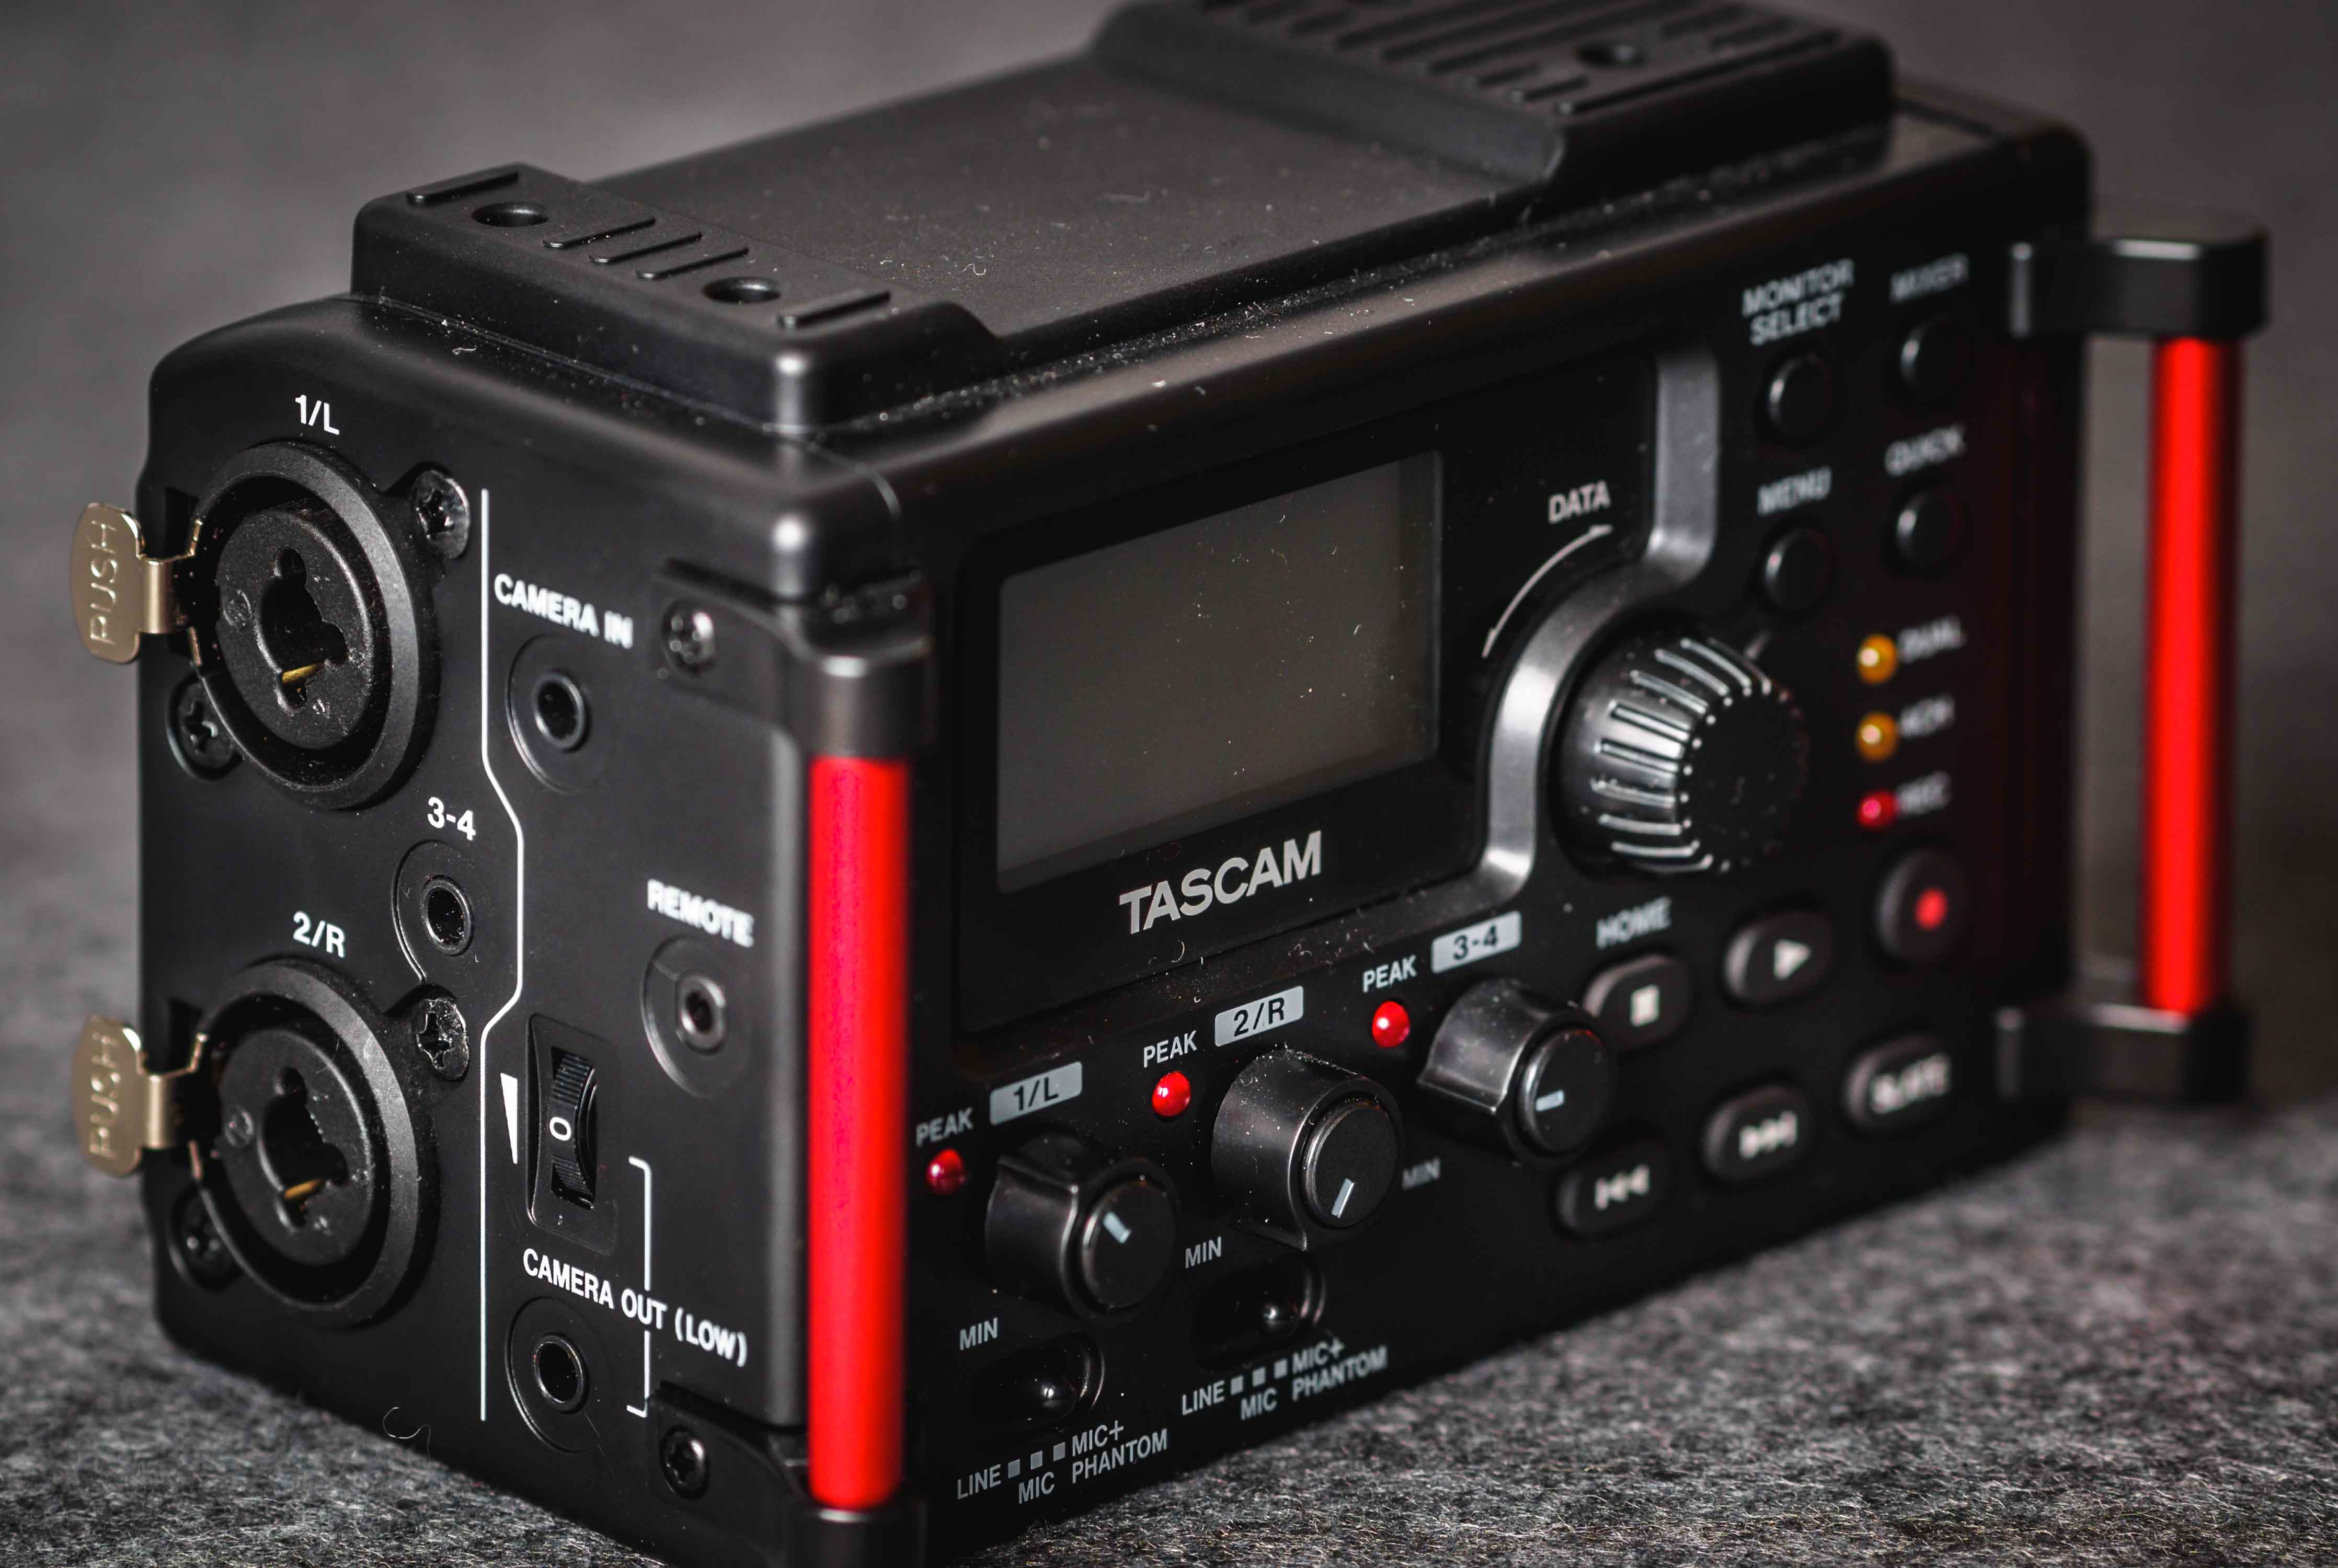
Tascam DR-60D MkII
If you’re wondering: In my tests, the preamps in the DR-60 are roughly equivalent to the ones in the H5, which are said to be identical to the ones in the H6. The 60D MkII, again, is 170€ and a very suitable (temporary) home for your audio files. If you need more inputs, the DR-70D offers that and besides that the same as the 60D.
I don’t have any (but would like some) experience with the SoundDevices Mixpre-3, but they’re not really available in Europe and… “kind of” expensive. Just in case you were wondering if there’s something better: With audio, there always is.
Interface
If you decide to go the XLR route and want to record onto your PC, you’ll need an interface.
Hands down, I think the Tascam US-2x2 is great. Jason thinks so too, as well as the Wirecutter. Who’d be arguing against this? It’s 125€.
A little more color on the US-2x2: The microphone preamps are one class up (“Ultra-HDDA”) from the ones in the DR-60D MkII (“HDDA”). As an interface connected to your PC it’s not as portable. Have your priorities in order and make a decision, both are great picks.
Microphone Stand
If it fits your room at all, I recommend mounting your microphone on a stand. The Røde PSA1 is nice, but not suited for lighter microphones in my experience.
I’m happier with the K&M 23850, but only after modding the thread that screws to the microphone holder. The piece of metal that holds the screw is just wedged in between two non-circular pieces, making it not react well to little adjustments. I fixed it with two shims.
Software
From full-on DAWs to some nice little apps, there’s a lot that can help you in creating your podcast.
Logic Pro X, 200€
I use Apple’s Logic Pro X. It’s definitely not the best tool for podcasts, but it’s what I ended up with. Further down I’ll name a few apps that fit the bill better.
LPX is built for music, and it shows. But can do some rearranging to make it better suited for podcast editing. Brett Terpstra has a nice blogpost on UI Tweaks, strip silence, presets, key commands, and ripple delete(!).
Chase Reeves covers some of the same ground on YouTube, I found his angle useful as well.
In case you end up using Logic: Strip Silence is a great feature. It removes the area of a specific track where nothing happens anyway. This makes it very efficient to deal with gaps in a recording. Sometimes I have to chop up a sentence or even a single word – but most of the time, after applying this feature, I just move around whole sections.
But: I think it’s very buggy. I always have to apply it with longer Pre Attack/Post Release-Times before it’ll properly apply the right ones. Just in case it’s buggy for you as well.
The settings I use: 4%; 0,6; 0,2; 0,4.
Audacity, free
Audacity is free, and it’s very powerful. I use it for recording, and it’s fine for file conversion and all kinds of little jobs that come up once you’re dealing with audio.
But, and this is a big but, for real editing it’s no good at all, because it only does destructive editing. You’re going to be sad when you apply some effects, edit a whole episode and then discover that you accidentally chopped up the first sentence. You’re going to have to do it all.over.again. That’s when you’ll “graduate” from Audacity to something else at the latest.
But, as I said, Audacity is a versatile tool. Further down I explain how I have used Audacity as a noise reduction tool to pretty good effect. I also still use it simply for recording on my laptop. While it is not pretty by any stretch of the imagination, it allows to show big db-meters (Logic does not).
SoX, free (but a command line utility)
For repeating tasks, like splitting a stereo wav into two mono files, Audacity sadly isn’t automation-friendly at all. Enter SoX. If you’re at all comfortable in the command line and scripting, it’s a great way not to have to do annoying repeating tasks like an animal.
To save you some time in case you have the same idea as me: For a brief moment I thought I found the silver bullet – SoX also offers noise reduction! But only nominally. Artifacts upon artifacts, not usable at all. More on noise reduction later.
Others
I’ve only used Audacity and Logic Pro X, so I can’t really speak in depth about other software for podcast editing. But I want to mention them to give you a jumping off point.
-
GarageBand, free with a Mac If you’re on a Mac, there’s no harm in starting out in GarageBand. Check out Jason’s post on (editing in general and) GarageBand vs. Logic.
-
Reaper/Ultraschall, 70€ Reaper always comes up, and probably for a good reason. While it doesn’t look especially beginner-friendly, it packs raw power, and there are tons of tutorials available.
There also is the Ultraschall project, which makes Reaper much more suited for podcast production. Ultraschall comes from a mostly German crowd, so most of it is in German. But! More and more seems to be happening in English as well. -
Hindenburg Journalist, 85€ Hindenburg is also mentioned often, definitely built with podcasters in mind and offers nice features.
-
Adobe Audition, 24€/month As well as Logic Pro X, it’s probably a bit overkill for podcast editing. But it has decent noise reduction built-in, so that’s something. The subscription price is really steep for non-professionals, though.
Wise Words
Whatever software you end up using, take time to get comfortable with it. I found that many, many aspects of podcast production are repetitive. This means they should either be automated, or if that’s not possible then at least handled in the most efficient way possible. So using templates, keyboard shortcuts and any other feature that saves you from repetitive manual labor is crucial.
For Logic Pro X, I already mentioned (again, check out Brett Terpstra’s post) Templates, Strip Silence and Ripple Delete. This last one sadly may not be feasible if you are working on more than three tracks at a time.
Editing
This one’s totally up to you. How much you want to craft your mono/dialogue, how many “um”s you take out – it’s your decision. Successful podcasts are found in all varieties, from three-hour ramblings to tightly edited 20 minutes.
I talk about methods, hard- and software in this post. But once you arrive at a setup, the editing is where most of the time goes. While everything else is important for how your podcast sounds, the editing brings the content in shape for a really good listening experience.
I spend 2-4 hours per episode, and a considerable amount of is listening through and straightening out the conversation. “Um”s, fillers, false starts, sentences that go nowhere, chop chop! This inevitably also has to do with me and my co-host not being professionally trained, not talking into microphones for a living. But then again, who does?
You may go for “less editing”, and more power to you. One word of advice though: While I support the idea that not everything has to be crafted to the n-th degree, you’re asking your listeners for their time. In my opinion, you should have an awareness of that. If you think the appeal of your show is your raw, unedited personality – better make sure that’s really the case.
My point is that, when in doubt, you should be a ruthless editor.
Mixing
Oh boy, mixing. It’s not as hard as you think. But it’s also far from trivial. You probably need to do less than you think. But to get it rightish, it might take some failed experiments. But it’s also fun.
Some wise words: For audio goes the same as for any kind of production. If you can get it right in camera/during the recording/capture of any kind, it’s (almost) always much more elegant to do so. Just because digital capture allows for some remarkable post processing, don’t rely on it. A good capture will result in a better product earlier in the process – and also give you even more flexibility in post.
So, keep coming back to the basics until you’ve nailed them: Record one track per speaker (okay, you don’t need to come back to this one a lot), reduce background sounds, reduce room echo, get a good signal level, improve microphone technique.
Mixing and Mastering
I wish someone had told me about the difference between mixing and mastering earlier. Short version: Mixing ist what you do to each recorded track individually to get the most out of it, processing-wise: Noise removal, EQ, compression etc. for podcasts.
Mastering is what is done to the whole production to make it coherent. Since these terms come from the music world, in mastering the loudness and sound of the tracks of a whole album are considered. For podcasting, I’d say this mostly manifests itself in consistency from episode to episode in terms of loudness.
Stacking Order
I’ll talk about effects I use in the order that I use them in. Even though most of this happens digitally, the order is not arbitrary at all! The signal changes by each effect. Depending on the particular effect, its behaviour and/or effectiveness can be altered dramatically by how the signal was processed before. So what’s the principle to go by?
“Cut first, enhance later”
The philosophy is as follows: Get rid of unwanted sounds early in the chain so they don’t come back to bite you when the signal is fed into the next effect. For example: Imagine there are high frequencies that you might want to reduce using an equalizer. Why have the signal go through a compressor before, where these frequencies may lead to unwanted results?
An even simpler example: Noise reduction is something I always put on top. It just doesn’t make any sense to let all the other processing react to the noise that I want to get rid off anyway.
Don’t worry if you’re confused. It’ll come to you naturally once you’ve grown more comfortable with different kinds of processing.
Randy Coppinger talks about stacking order in this brilliant episode (mainly on compression, that section’s further down) of The Podcaster’s Studio from 52:40 on (Overcast timestamp link).
Mixing: Noise Reduction
Remember what I said about getting a clean recording? Well, that’s the goal. However, I haven’t come across a non-professional setup that doesn’t introduce hiss. Some might find “some” hiss not that noticeable, or at least for them it doesn’t warrant whipping out the noise reduction tools.
For me, it does.
Practical tip: If you know what kind of noise you’re dealing with while recording, a good practice is to get a few seconds of just that pure noise while recording.
Noise reduction plugins work in different ways, but the tradeoff using them is always the same: Get rid of as much noise as you can without muffling the signal or introducing artifacts.
NR with Audacity
If you want to use Audacity for NR before you feed the cleaned up audio in the DAW of your choice, that’s a perfectly reasonable thing to do. This seems like a good detailed tutorial. Except for one thing: “If you want to go wild and play with the controls, have fun, or just click OK like I do.” – The sliders make all the difference, of course! The Audacity manual describes what they do pretty well. With this information and a little experimentation, you should be able to clean up your signal a good bit. For what it’s worth: To deal with quite some hiss from (my old DR-40D’s) preamps, I went with these settings:
- 12dB
- Sensitivity 1
- Frequency Smoothing 12
Remember: You always risk taking away too much from the original signal, introducing artifacts. So, when in doubt: do less.
NR with iZotope Voice De-noise (included in iZotope RX 6 Elements and up), 130$ / regularly on sale for 30$
iZotope’s suites seem to be the industry standard for noise reduction… for some reason. Okay, I was probably doing something wrong, but I found it to be lacking compared to Audacity’s NR. I had to be fairly aggressive, crank up Threshold and Reduction quite a bit, still had noise and got more muffled voices. Who knows – maybe Audacity’s NR is just so good, despite it being free.
But I don’t want to be purely negative: Since iZotope offers real “grown up” software, their Voice De-noise comes as a plugin (as well as part of a standalone app). Using it as a plugin, “live” in your editing app of choice is a nice perk. Instead of making all the decisions at the beginning and being stuck with them, it allows you to tweak the settings as you go.
In my experience, using the Learn function doesn’t offer any benefit. But the almost set-and-forget nature of the Adaptive Mode is nice. For a starting point, the settings below are what I now use for some very gentle denoising added after another kind of denoising (Brusfri, read below).
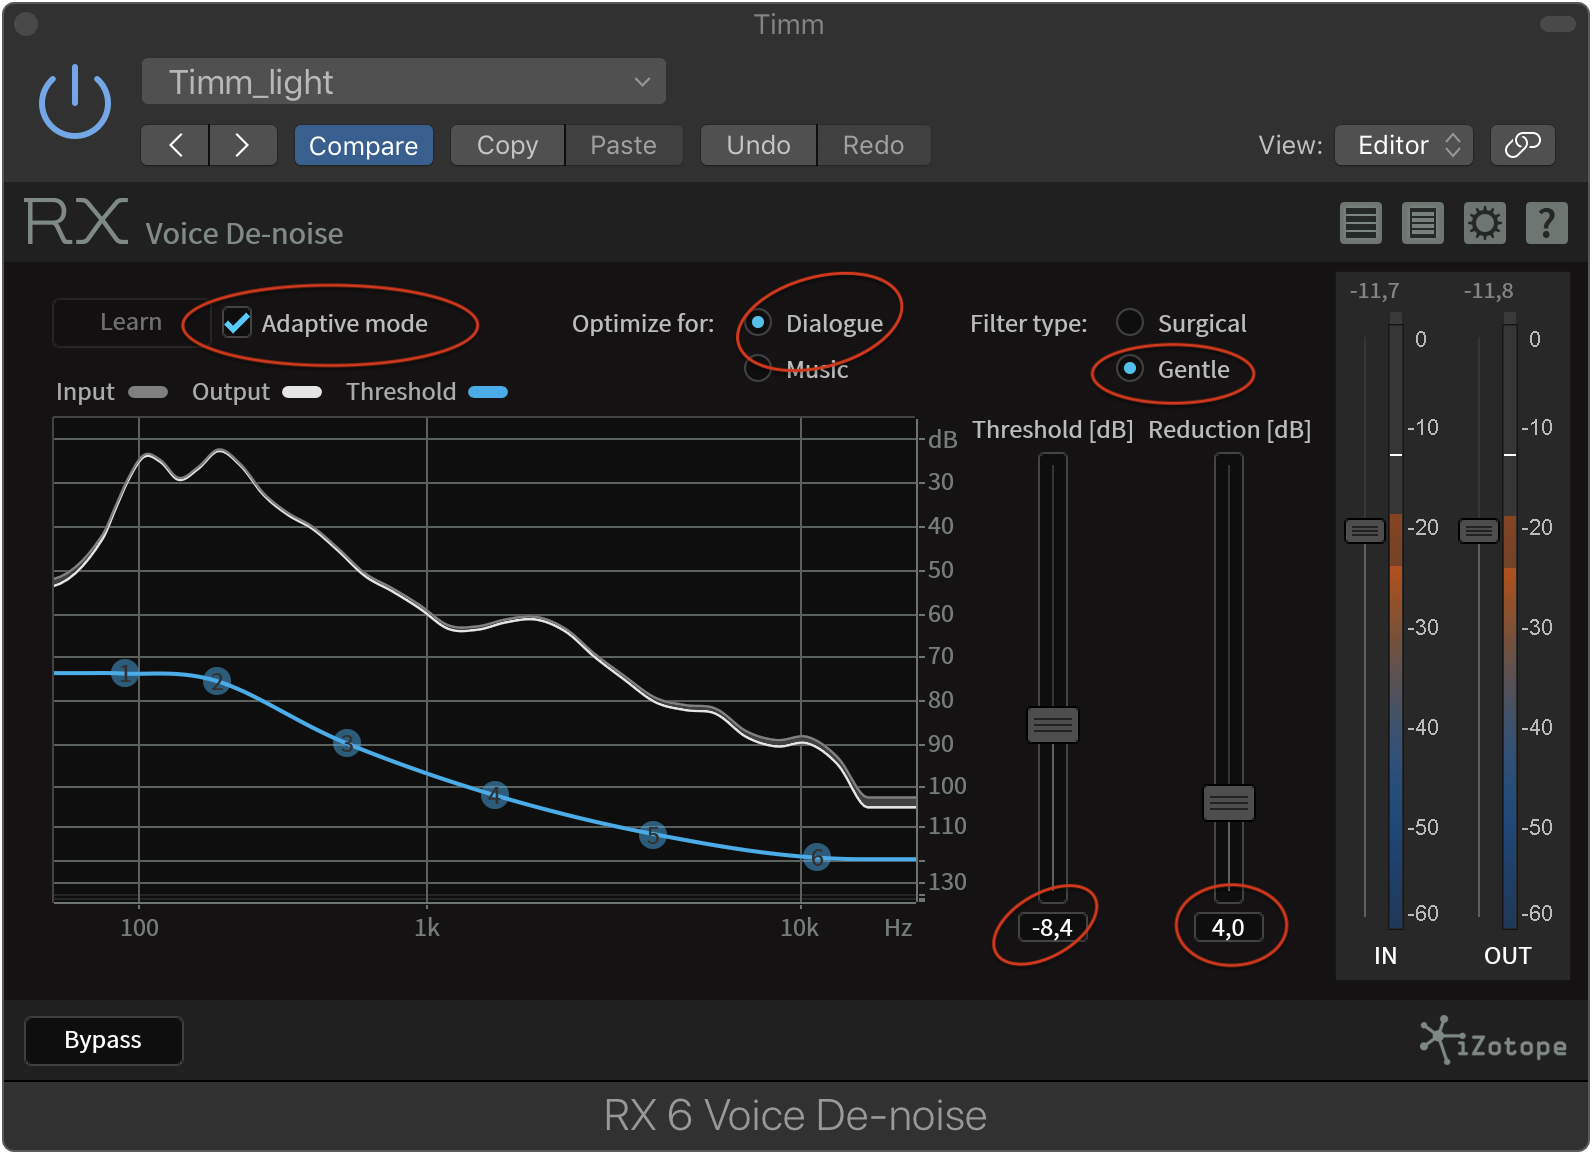
iZotope Voice De-Noise in action
NR with Brusfri, 60€ / sometimes on sale
Much more satisifed I am with Brusfri. It works in a way that lends itself well to continuous noise like hiss or hum. Which I have to think is what most podcasters are dealing with, right?
I was really blown away. You have to feed Brusfri some pure noise since there’s no auto/dynamic microphone mode, but boy does it work. In my experience, there is minimum risk of producing artifacts or muffled sound. In most cases, I even reduce the threshold to somewhere between 40% and 20% and still get stellar noise reduction.
Some negative: The interface is a little heavy on the hipster – which is to say it’s a little user hostile. Some sliders as well as having values readable without having to hover would do wonders to its usability.
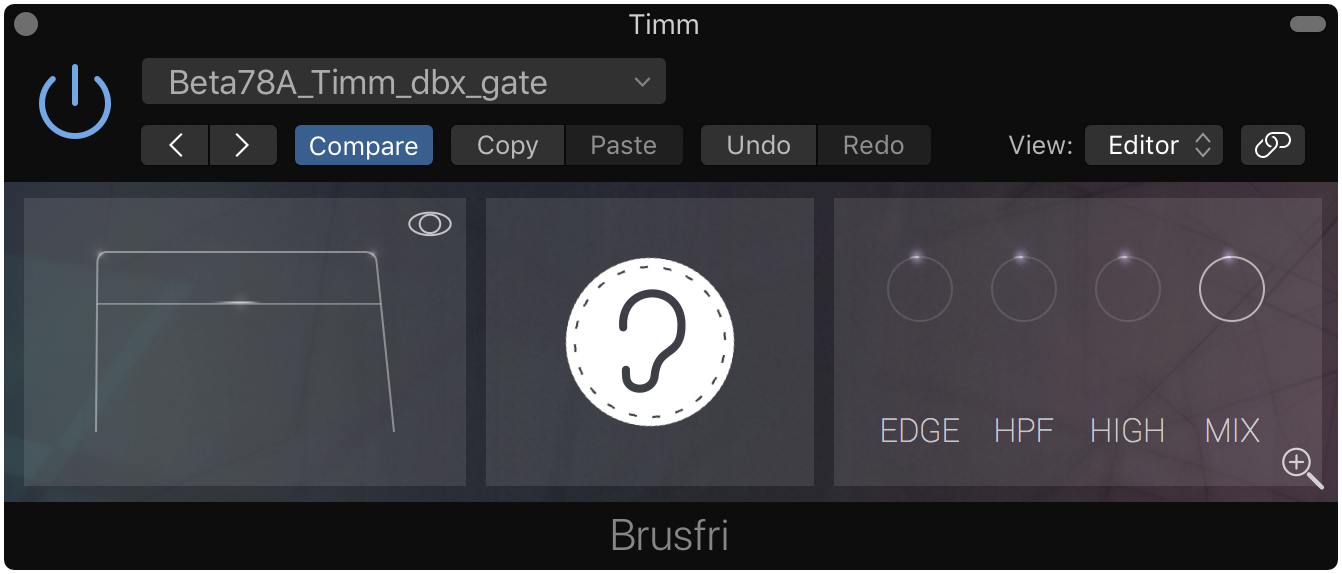
Brusfri's hipster interface
Mixing: Noise Gate
While noise reduction “cleans up” the signal itself, a noise gate opens and closes (= doesn’t let signal through) depending on the signal strength. It’s handy because it allows you to only deal with the “proper” output of a channel. But it’s easy to overdo it and end up with speech that is cut off. Just remember that natural speech is not on/off, but gets louder and quieter gradually. You only want to cut off the signal when there’s nothing of the speech left in it, not just after the loudest part has gone by.
Let’s go over the most common settings of a noise gate. Since every recording setup and situation is different, most concrete values I use mean nothing. But, since most of podcasting shares the use of human voices, I’m still referencing them to just give a ballpark.
-
Threshold: When the signal is under the threshold, the gate is closed. This is the cutoff-point, which means that spoken word should constantly be louder than the threshold, as well as the occasional “Mh-hmm.”
-
Reduction: The amount/degree to which the gate closes. You probably need less than you think. The goal of a gate is not to eliminate absolutely every sound in between speech, it’s just to have a nice separation between the important and the unimportant stuff.
-
Attack: How fast the gate reacts to the signal passing the threshold. For speech, it probably doesn’t need to be as fast as 5ms, because our voices need some ramp-up. But I also don’t see how a fast Attack hurts.
-
Hold/Release: For speech, I can’t philosophically see Hold and Release as separate values. A Hold of 100ms in isolation is probably too short, but since speech doesn’t keep on ringing like some instruments do and stays above the Threshold, it works in conjunction with a longerish Release. I think a Release of up to 400ms also worked well for me.
-
High/Low Cutoff: This is crossed out because it’s basically two equalizer filters that creeped in Logic Pro X’s noise gate plugin.
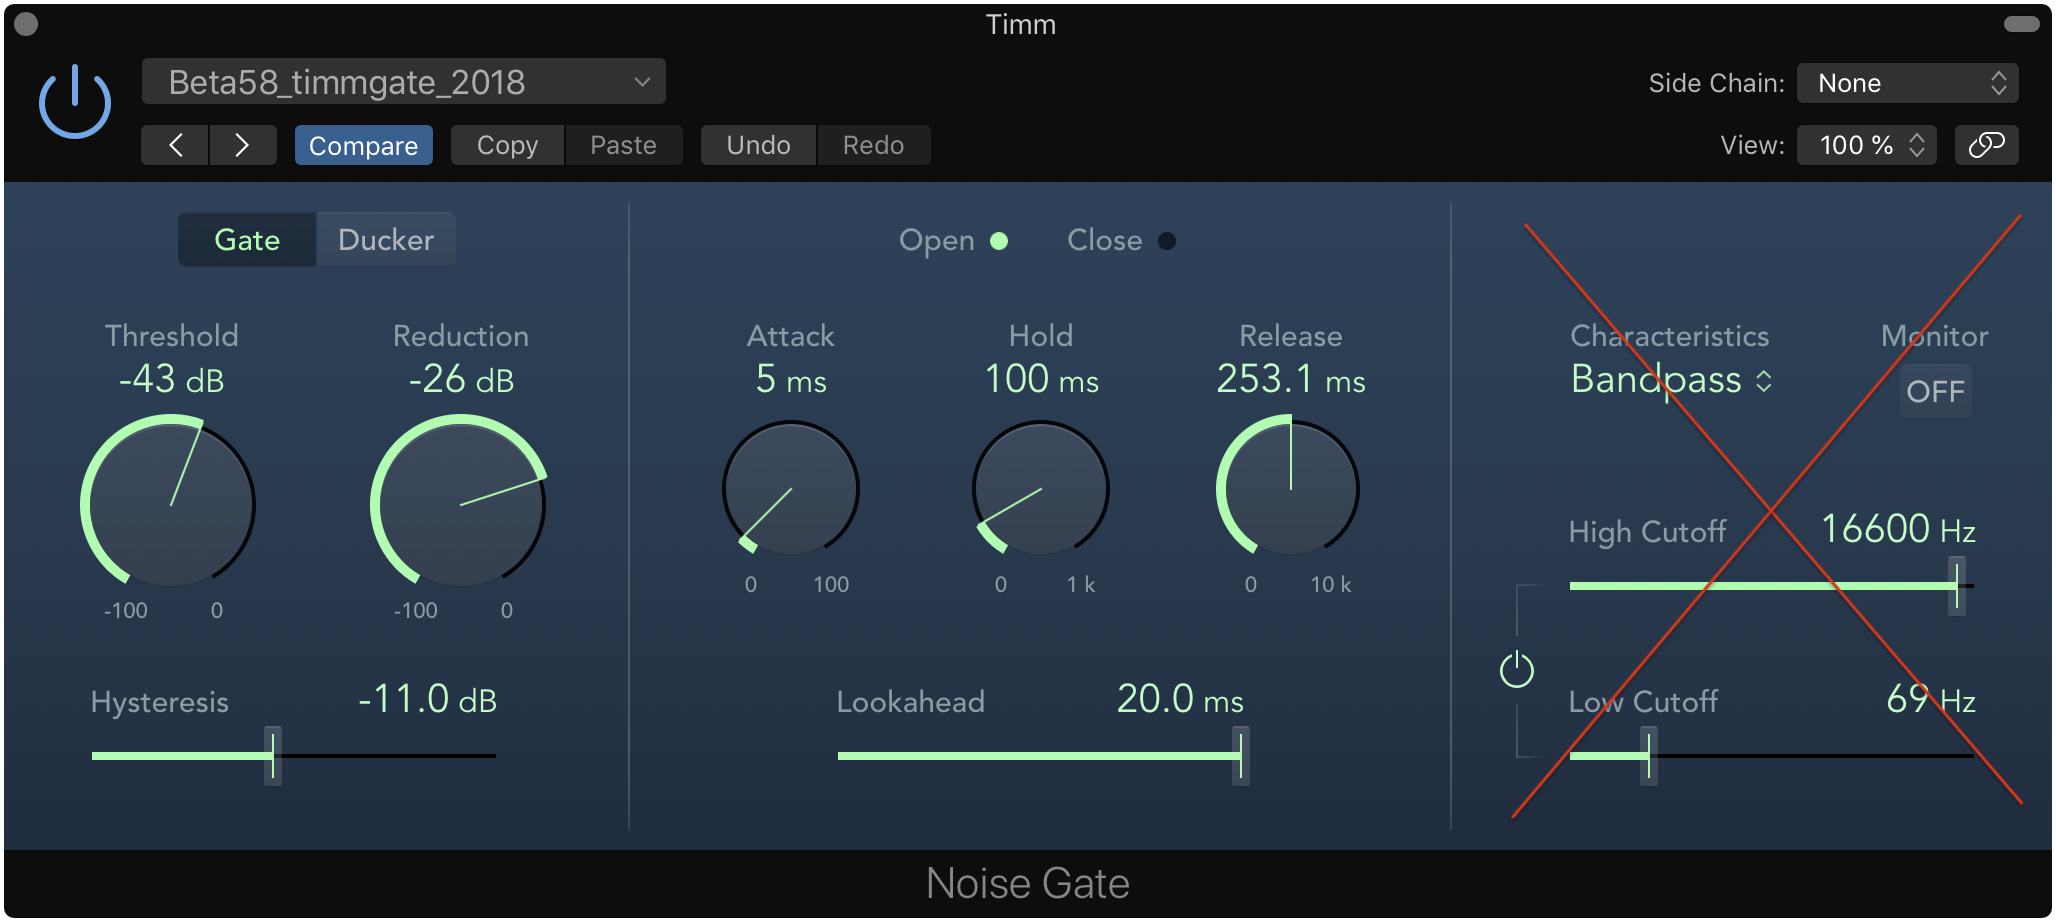
Logic Pro X's noise gate plugin
Mixing: EQ
Equalization is used to suppress unwanted aspects and enhance wanted qualities of a voice. Reducing some boominess or a nasal tone, push the high end a little – voilá, the EQ is your friend!
I find using the EQ well probably harder than it is, but boy… it’s no walk in the park for sure. Lucky us, there’s great resources out there for EQ as well.
First and foremost: Ep. 87 of The Podcasters’ Studio with Rob Williams (Overcast link).
The exact EQ Cheat Sheet Ray and Rob talk about seems to be no more, except for in this screenshot. But Rob has a new thing going: How To Eq Vocals. Keep in mind that this specific tutorial – and most you’ll find – are aimed towards EQ for vocals in music, not for spoken word in podcasts. The more broad a lesson is, the more it’ll apply. Use your best judgment in implementing specific techniques.
What I think are the most important takeaways:
- Boost wide, cut narrow (Step 5 in this tutorial)
- Cut to eliminate problems, boost to enhance good qualities
- If your EQ curve looks like a rollercoaster, you probably went wrong somewhere – a little EQ goes a long way
- Breaks. This goes for all kinds of audio work, but especially for tweaking EQ: Take lots of breaks. Give each tweak some time. Be gentle.
Mixing: Compression
Dynamics compression in podcasting is done to improve intelligibility. It’s an important tool to reach a more even volume on each track. Why is that important, as long as everything is loud enough? Well, it’s not fun to listen to voices of constantly changing volume. This also goes into the topic of loudness standards, but more on that later. Just keep in mind that compression is about reducing the dynamic Range, the gap between the loudest and quietest part of a given signal.
It takes some mental pull-ups to wrap your head around the concept. I’ll give a short explanation a go. Compression somehow is associated with raising the volume of the signal. This is wrong – but only kind of. What compression does is leveling out the signal. The signal that exceeds the Threshold is knocked down by a certain amount. That amount is defined by the Ratio.
So far, the loudest parts of the audio got quieter. This means that the dynamic Range is reduced.
After compression, typically some Makeup Gain is applied. The now “smoothed out” signal as a whole is turned up by a certain amount. This is where compression gets its false reputation from.
Beware: Compression is complicated enough in practice that I wouldn’t trust a random YouTube tutorial on the topic. I’m positive that everything a podcaster needs in this regard is at least touched on in Episode 88 of The Podcasters’ Studio with Randy Coppinger (Overcast link) that I mentioned before. Randy and Ray go into great detail on almost everything – and compression ;-)
Here’s my two cents on the main takeaways and everything I picked up on the topic since:
-
Threshold: As a starting point I suggest – some mixing pros might want to kill me, but I had good results – 6dB below a track’s total RMS level. Pow!
Sidebar: RMS is a kind signal level reading. It’s a “more average” (that’s the technical term!) representation than a pure peak measurement. -
Ratio: Totally depends on your approach/taste/needs. You could start at 2.5 and take it from there. For illustration purposes I’ll recount an example Randy gave in the episode: You can combine a rather low Threshold with a low Ratio. This results in Compression that will be active more of the time, but more gently. You could also combine a high Threshold with a high Ratio. This way, the compressor only reacts to the very loud parts of the signal, but then really slams it down.
-
Attack/Release: For speech, auto settings tend to work well if your compressor plugin offers them. Other than that, a fast talker warrants a fast Attack (somewhere between 10-15ms). A typical Release might be somewhere between 20 and 80ms.
-
Peak vs. RMS: If you can set whether the compressor reacts to peak or RMS (in Logic, that’s hidden in the “Side Chain” menu) the latter makes more sense. Except if for the one part of the track with excessive laughter, you want to use a compressor as a limiter and punch down those really high peaks. It’s hard to believe, but in mixing there are no hard and fast rules, and there are many philosophies to try and choose from.
-
Makeup Gain: This setting is applied to the whole signal. What one could aim for here is the average reduction that is caused by the compressor itself. Why? I think because the headroom you gained by reducing the “overly” loud signal can now be “spent” on raising the whole signal.
BUT you can also leave the makeup gain be and use a separate gain adjustment later. -
Knee: I fail to be able to hear the difference, but I picked up that a “soft” knee (higher value) is good for voice ¯\_(ツ)_/¯
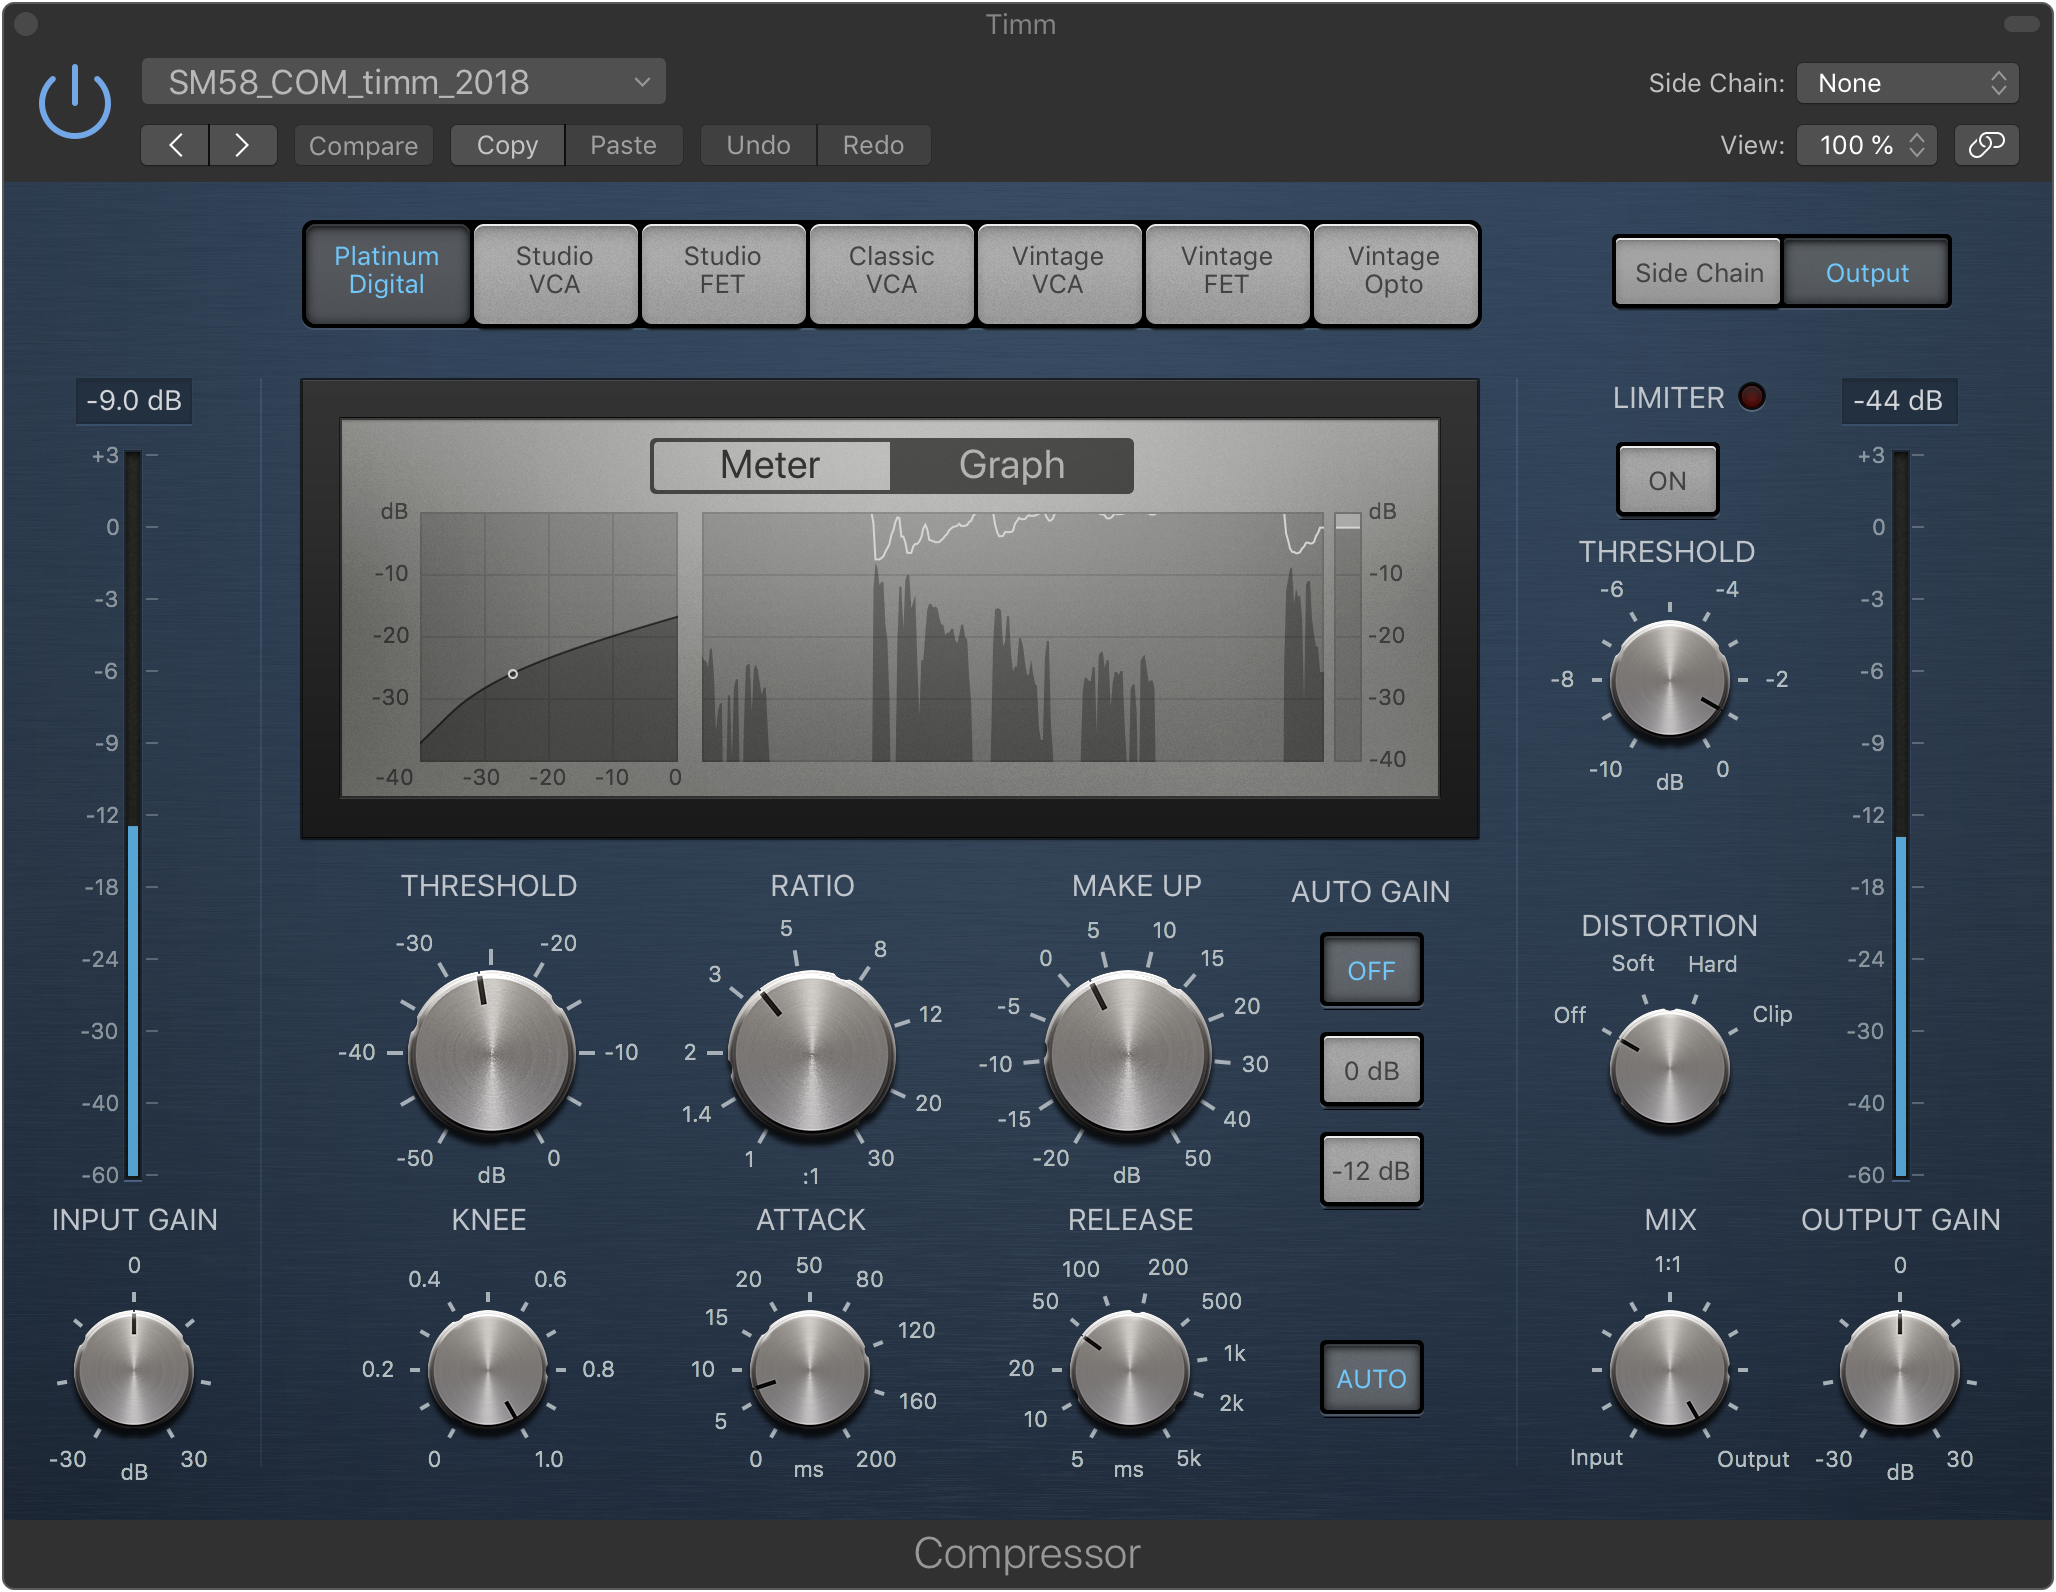
Logic Pro X's compressor plugin
Mixing: Limiting
Limiting is basically the same as compression – only viewed from the “other side”. It’s a basically a compressor with an infinitely high ratio that slams the signal down once it reaches the set threshold.
While you can definitely use it in the mixing of each track, it’s more of a mastering tool I think. It’s a way of making sure that nothing exceeds 0dB.
Important to know: A lossless file, like a wav from your editing suite, will peak exactly where it “should”. If you limit to -1dB, the .wav will peak at -1dB. But nobody distributes their podcast as .wav, because that’d be ridiculous. Once you convert to a lossy format like mp3, there will be higher peaks. This has to do with the way data compression works: There are simply not as many data points, and by “jumping” from one to the next, there can be higher peaks than in the original file.
For this reason, once you talk limiting, it’s common to not use dB = decibel, but dBTP = decibel true peak. A dBTP value is arrived at by simply oversampling the signal, usually 4X. So, if you limit at the master stage, definitely set everything you can to dBTP.
How much higher the peaks will be depends on the amount of data compression (how lossy the final mp3 will be). You want just one value? Okay, -2dBTP are considered safe for most applications. Don’t worry about the “loudness compliance” part for now, we’ll get to that almost immedialtely.
Logic Pro X’s limiter plugin is… “a little weird”. In order not to produce a limited but also quieter signal, you have to “add” gain that matches the negative output level (Thank you Paul!).
Release and Lookahead – Sorry, no insights from me here. I just use the settings that Paul recommended for mastering voice, never had a problem with those. Just remember that True Peak setting.
I use -9.5dBTP as output level here, which has to do with – you guessed it: loudness. Limiting is important enough for any production, but all of this becomes more important and interesting once we talk loudness standards!
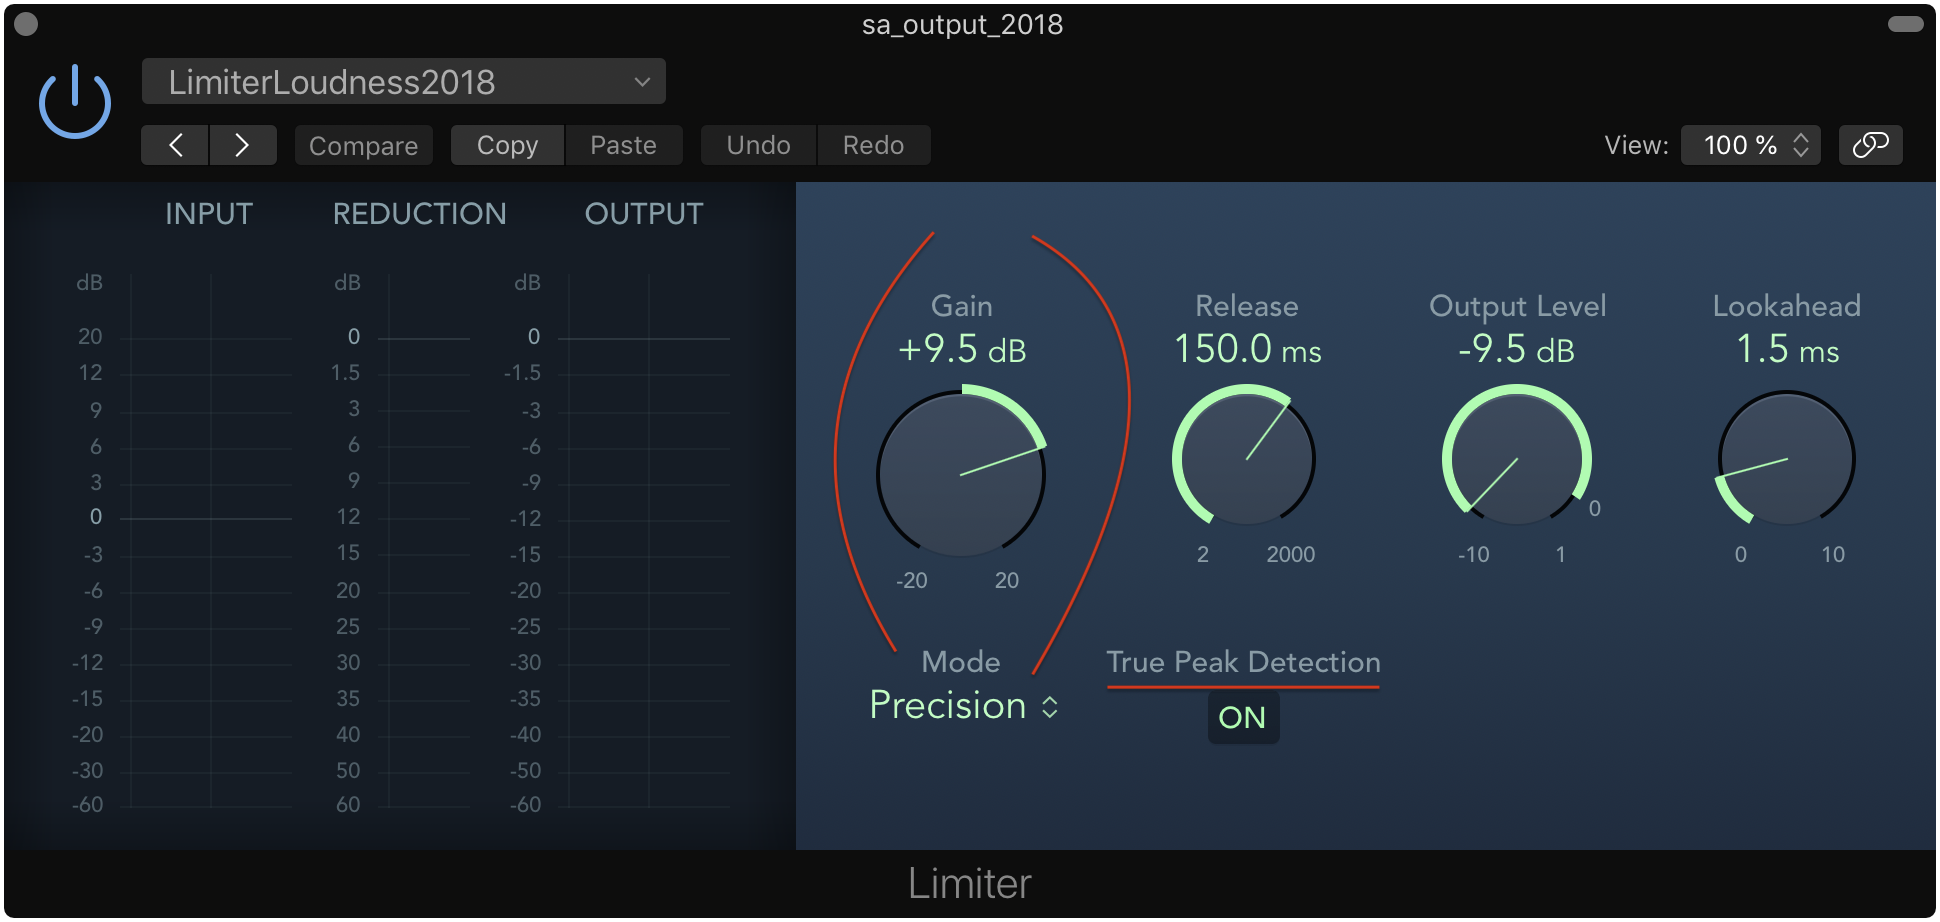
Logic Pro X's limiter plugin
Loudness Standards
Finally!
From designers (who already tend to be very nerdy) I sometimes hear that typo nerds are really the crazy ones. I think the same applies to podcasters and then those who proud themselves on adhering to loudness standards.
Why is caring about loudness important at all, you ask? I’ll let Rob Byers of transom.org speak:
when folks listen to podcasts on a mobile device, they are likely on-the-go. Commuting via metro […], bus, walking, whatever. Or they are listening while doing the dishes or driving in the car. All of these scenarios will have loud background noise that competes with the audio.
This fits with what I already talked about regarding compression and how it helps intelligibility. It is kind of a prerequisite for a coherent production that is loudness standard compliant.
Loudness standard? This is where the whole loudness thing goes a little further. The goal is not only that every podcast is “loud enough”, but that audio of the same kind is of equal loudness – across the board! No hastily reducing the volume because the next show’s intro makes your ears hurt – a real utopia, but we’re getting there. For this purpose, there needs to be a way to measure “loudness” as well as a standard everybody aims towards.
Metering
There have alway been meters in audio, but for a long time there was no objective way to measure “loudness”. Peak amplitude or even RMS are measurements, but they are based upon the energy within a given signal. This doesn’t correlate to how loud a program is *perceived by a human ear. This is because our ear has a built-in equalizer, doesn’t have the same response to different frequency ranges (babies crying, evolution and stuff). The loudness standard gods came up with a measurement that simply takes this “ear EQ” into account. It’s called LUFS – Loudness Units Full Scale. I bet you’re already in love with it.
In the real world, this means that you can use a Loudness Meter in your DAW of choice, most have one by now. Note that using a Loudness Meter as you go is great for tweaking and experimenting. But generally, you’ll need to look at a file – or a track – as a whole, and listening through all the way just to get a loudness reading is a non-starter. “Offline measuring” is what you want, and the resulting reading is called the “integrated” loudness.
If you’re on a Mac, I can recommend r128x.
The iZotope suites include a “Waveform Statistics” tool that I also like.
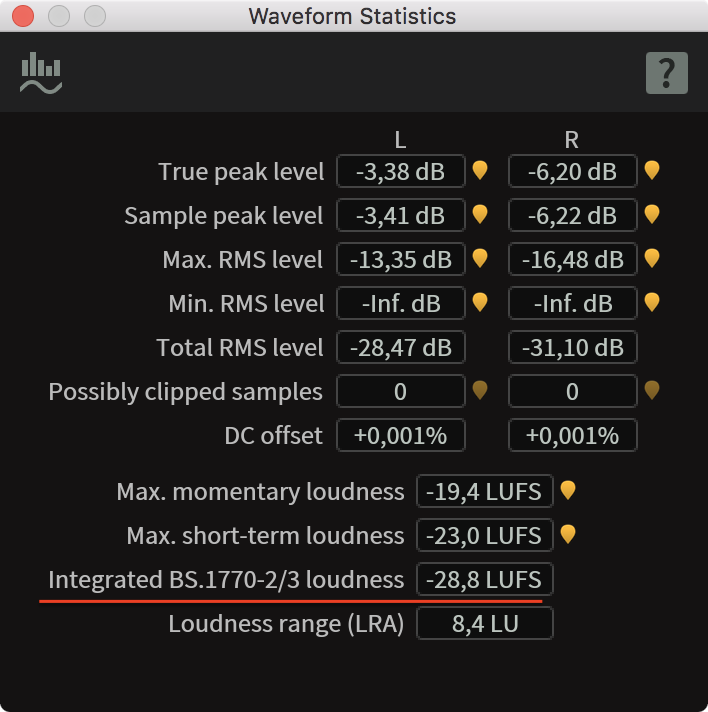
iZotope Waveform Stats
Another point of confusion might be that stereo and mono handle differently. There’s a 3dB offset: Stereo files should come out at -16 LUFS and mono files at -19 LUFS. Paul explains it.
Loudness Workflow
Now that we’ve covered the basics, let’s dive right in. I promise it’s less confusing once you’ve applied the workflow yourself. In a nutshell, the loudness workflow is this:
- Make each track equally loud
- Limit for headroom
- Add gain
– with the last two steps being always the same, and done on the Master track.
Why the limiting? Without it, the later addition of gain would almost certainly lead to several moments if clipped audio.
Here’s my loudness workflow which is built upon Paul’s Workflow post:
- Step 0: The prerequisite is a properly mixed file. Depending on how you used to process your audio, some more compression might be necessary. This is so that the limiting we do later doesn’t knock the majority of your signal down, which would sound bad. Besides that, this just steps is just all the processing you’d normally do, for each individual track.
- Step 1: Normalize each track to target level -27.0 LUFS.
This is a variable step, the offset is different for each track and each recording
- Each track needs to be measured (LUFS, whoop!) in order to calculate the offset to -27 LUFS. Example: If one track measures out at -32.3 LUFS, then the offset is 5.3.
- For each individual track, apply the offset by adding a gain effect as the last plugin.
- Step 2: Limit for headroom on the Master Track
- Use a Limiter set to -9 dBTP (in terms of risking intersample peaking this works out for me because I release a 128kbps mp3), Lookahead 1.5ms and a Release of 150ms
- (If you use Logic, be aware of the weirdness I pointed out when talking about limiting)
- Step 3: Apply 8dB of gain on the Master Track
- Result: After bouncing, you should end up with a file that measures at -16 LUFS (stereo)/ -19 (mono). It also should have a loudness range somewhere south of 8 LU. If you end up with a higher value, you might need to put some more dynamics compression on one or multiple tracks.
For all the remaining why and how (Why -27LUFS, why three steps, why why whyyyy?) – here are my top 5 resources:
- A good starting point: Two The Podcasters’ Studio Episodes, an interview with Georg Holzmann
- Paul’s Workflow Post
- transom.org: Audio Levels and Processing
- transom.org: Loudness for Podcasts vs. Radio
- Paul’s Loudness Compliance Summarization (you graduate loudness school when you can explain everything on this chart)
Exporting
You’ve bounced your project file to a nice .wav, all the work is done. All of it? Not quite.
Quality
The question that every podcaster faces at some point: How many kbps are enough for my final mp3?
For a long time, I’ve been in the 64kbps mono camp. “Good enough for voice”, sure! Until I went down a rabbit hole of misguided EQ tweaks that got me nowhere. I had arrived at a sound in Logic that I was very happy with. Only the mp3 had something to it – not quite compression artifacts, but also nothing that was existing in the wav file. It drove me crazy. I then finally did another comparison of 64 vs. 128kbps and heard a difference. It may be some aspect of my voice that I’m really (overly) allergic to – however, I found the sound more pleasing, end of story.
Try 64kbps, and if you’re happy with it: great. If not, just go for 96 or 128kbps. Audio is packed into tiny files. People are out and about streaming 4k video, for F’s sake!
Forecast: Finalizing, Chapters, Tagging
I always found including chapters a hassle. Until all-things-podcast-Marco released Forecast publicly. Try it, it’s fun! Forecast also makes all the tagging and naming a breeze, derives episode names from your folder/filename structure which is very clever and works great.
A word regarding chapters: mp3 chapters seem to only have a “resolution” of full seconds. If you’re really particular about people jumping right to the middle of a word, consider this while placing markers – or move the audio around a bit. Me and my cohost are fast talkers, a little more space between sentences generally is a good thing anyway.
Forecast also allows for very convenient addition of chapter images.
I can’t come up with a reason why you shouldn’t use Forecast for finalizing podcast projects.
Dithering, or “how to mp3”
Even the very final step, podcasters argue over. Just make your project an mp3, right? Not so fast! Enter the dithering problem complex! If I’m going from 24 to 16 bit, something needs to happen to that extra information that doesn’t “fit” in the 16 bit file. If not handled properly, the distributed 16 bit file can sound (probably inaudbly, though) worse than one recorded at 16 bit in the first place.
But!
If you are, as any sane podcaster is, distributing an mp3, I’m not so sure. The LAME encoder for example internally works at 32 bit. So I can’t fathom why you’d need to go “down” to a 16bit wav before feeding the file to LAME. Just feed the encoder the best file you have and let it worry about the rest.
That’s Marco’s theory and I found sources that reinforce this stance. In short, this is what I’d recommend:
- Record a 16 or 24bit file
- Do your editing, mixing etc.
- Export to whatever quality level you’ve recorded at
- Throw the file over to Forecast (which uses the LAME mp3 encoder)
Audiogram
Not quite a tool exporting, but promoting: The folks at NPR released an Audiogram tool. With this, you can create a video file out of a snippet. Great for promoting an upcoming episode on social media.
Hosting
Whatever you do, don’t host on SoundCloud. Its future is uncertain, they hide your mp3s from you, and even with a paid plan you haver very little control over your feed/files.
I use Simplecast. It’s pretty solid I’d say. They could make the included website a little more customizable and finally come out with more detailed statistics. But overall im pretty happy. Their customer service is responsive, overall they strike a good balance between customizablity and usability, and they can put you on Spotify! They also offer a snazzy embeddable player that I’m using later in this article.
I bet you also don’t go wrong with choosing Dan Benjamin’s (of 5by5 fame) Fireside.fm.
The omnipresent (as podcast advertiser) Squarespace also does podcast hosting – but you have to twist its arm a little bit to get there. I remember quite some forum-hopping and hassle to have everything just-so for my old podcast.
Also: the last time I observed a friend set up her website on Squarespace, it felt a little like… I’m gonna say it: Wordpress (if you don’t know Wordpress: It’s powerful, but boy is it ugly and hard to use).
There’s also libsyn – big podcasts use it, I’ve heard only good things about it. But I have no idea how well suited it is for smaller endeavours.
Live signal processing with a dbx 286
You know what’s fun? Taking everything you’ve learned and throwing it out the window.
Not really of course, because that knowledge still comes in handy. I felt a little weird though, “transferring” some/most of the stuff I did in Logic to a box that I plugged in between microphone and Interface. Sorry, I’m getting ahead of myself!
If you feel fancy or adventurous or both, you can do what radio stations or streamers do: Do most of the post processing… well, during recording. There’s a risk: If you screw it up, the recording is screwed up. Philosophically, I’d be totally opposed to this. But the upside is a reduced amount of work after the fact. My post processing now consists of noise reduction, loudness optimization and some EQ that I’m working to get rid of – That’s it!
I went down this path mainly because I was looking for a higher-quality preamp, but now I’m in love with recording a nicely compressed signal.
If this sounds like it might be for you: You might want to take a look at a dbx 286. It’s a dedicated microphone preamp that also does processing – very well suited for podcasters. It does compression, de-essing, some EQ, and some gating. Sure, 170€ per channel is nothing to sneeze at for a hobbyist. But you can get good deals on a used predecessor model (I got one for 30 bucks. 30!).
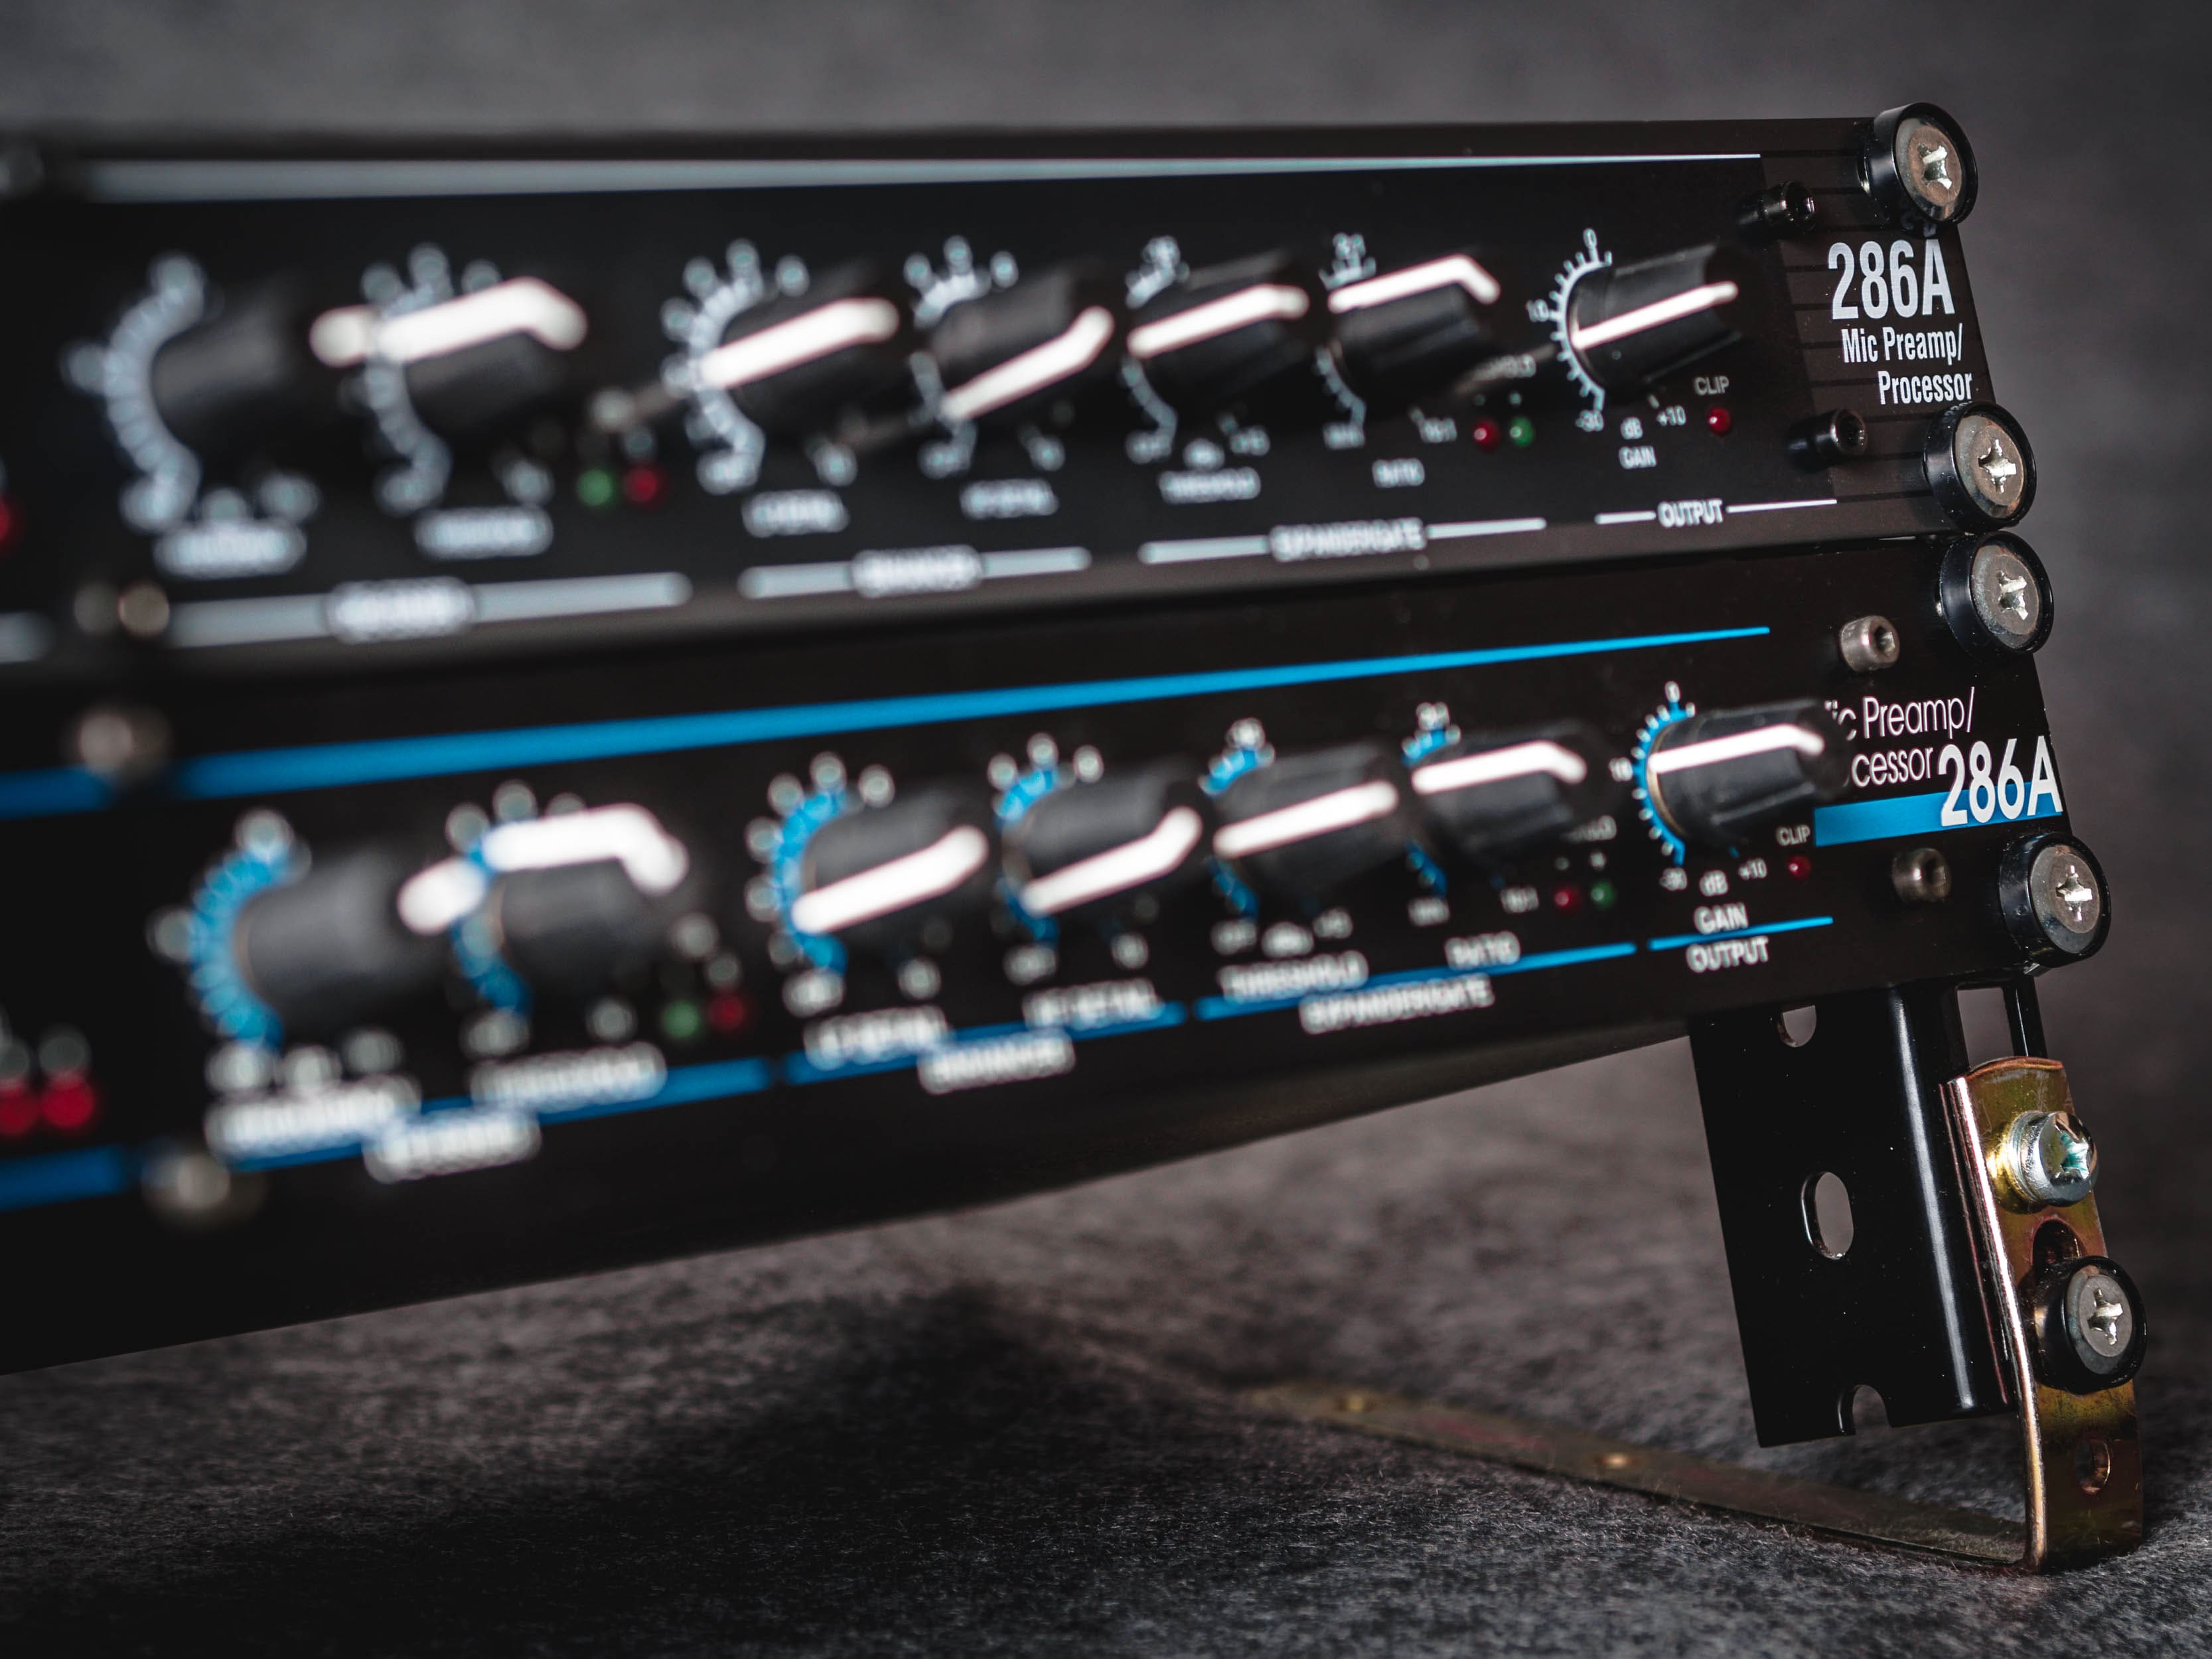
My two dbx 286 – mounted on two 3 HE rack parts and metal brackets from the hardware store
A word on the different versions: The dbx 286A seems to be almost indistinguishable from the current model, the 286S. The 286 (no A) has an external power supply. There’s also two versions of the 286A: with “Project 1” labeling and without. The Project 1 version seems to be older. If anything though, it produces less hiss on the highest gain settings than my “regular” 286A.
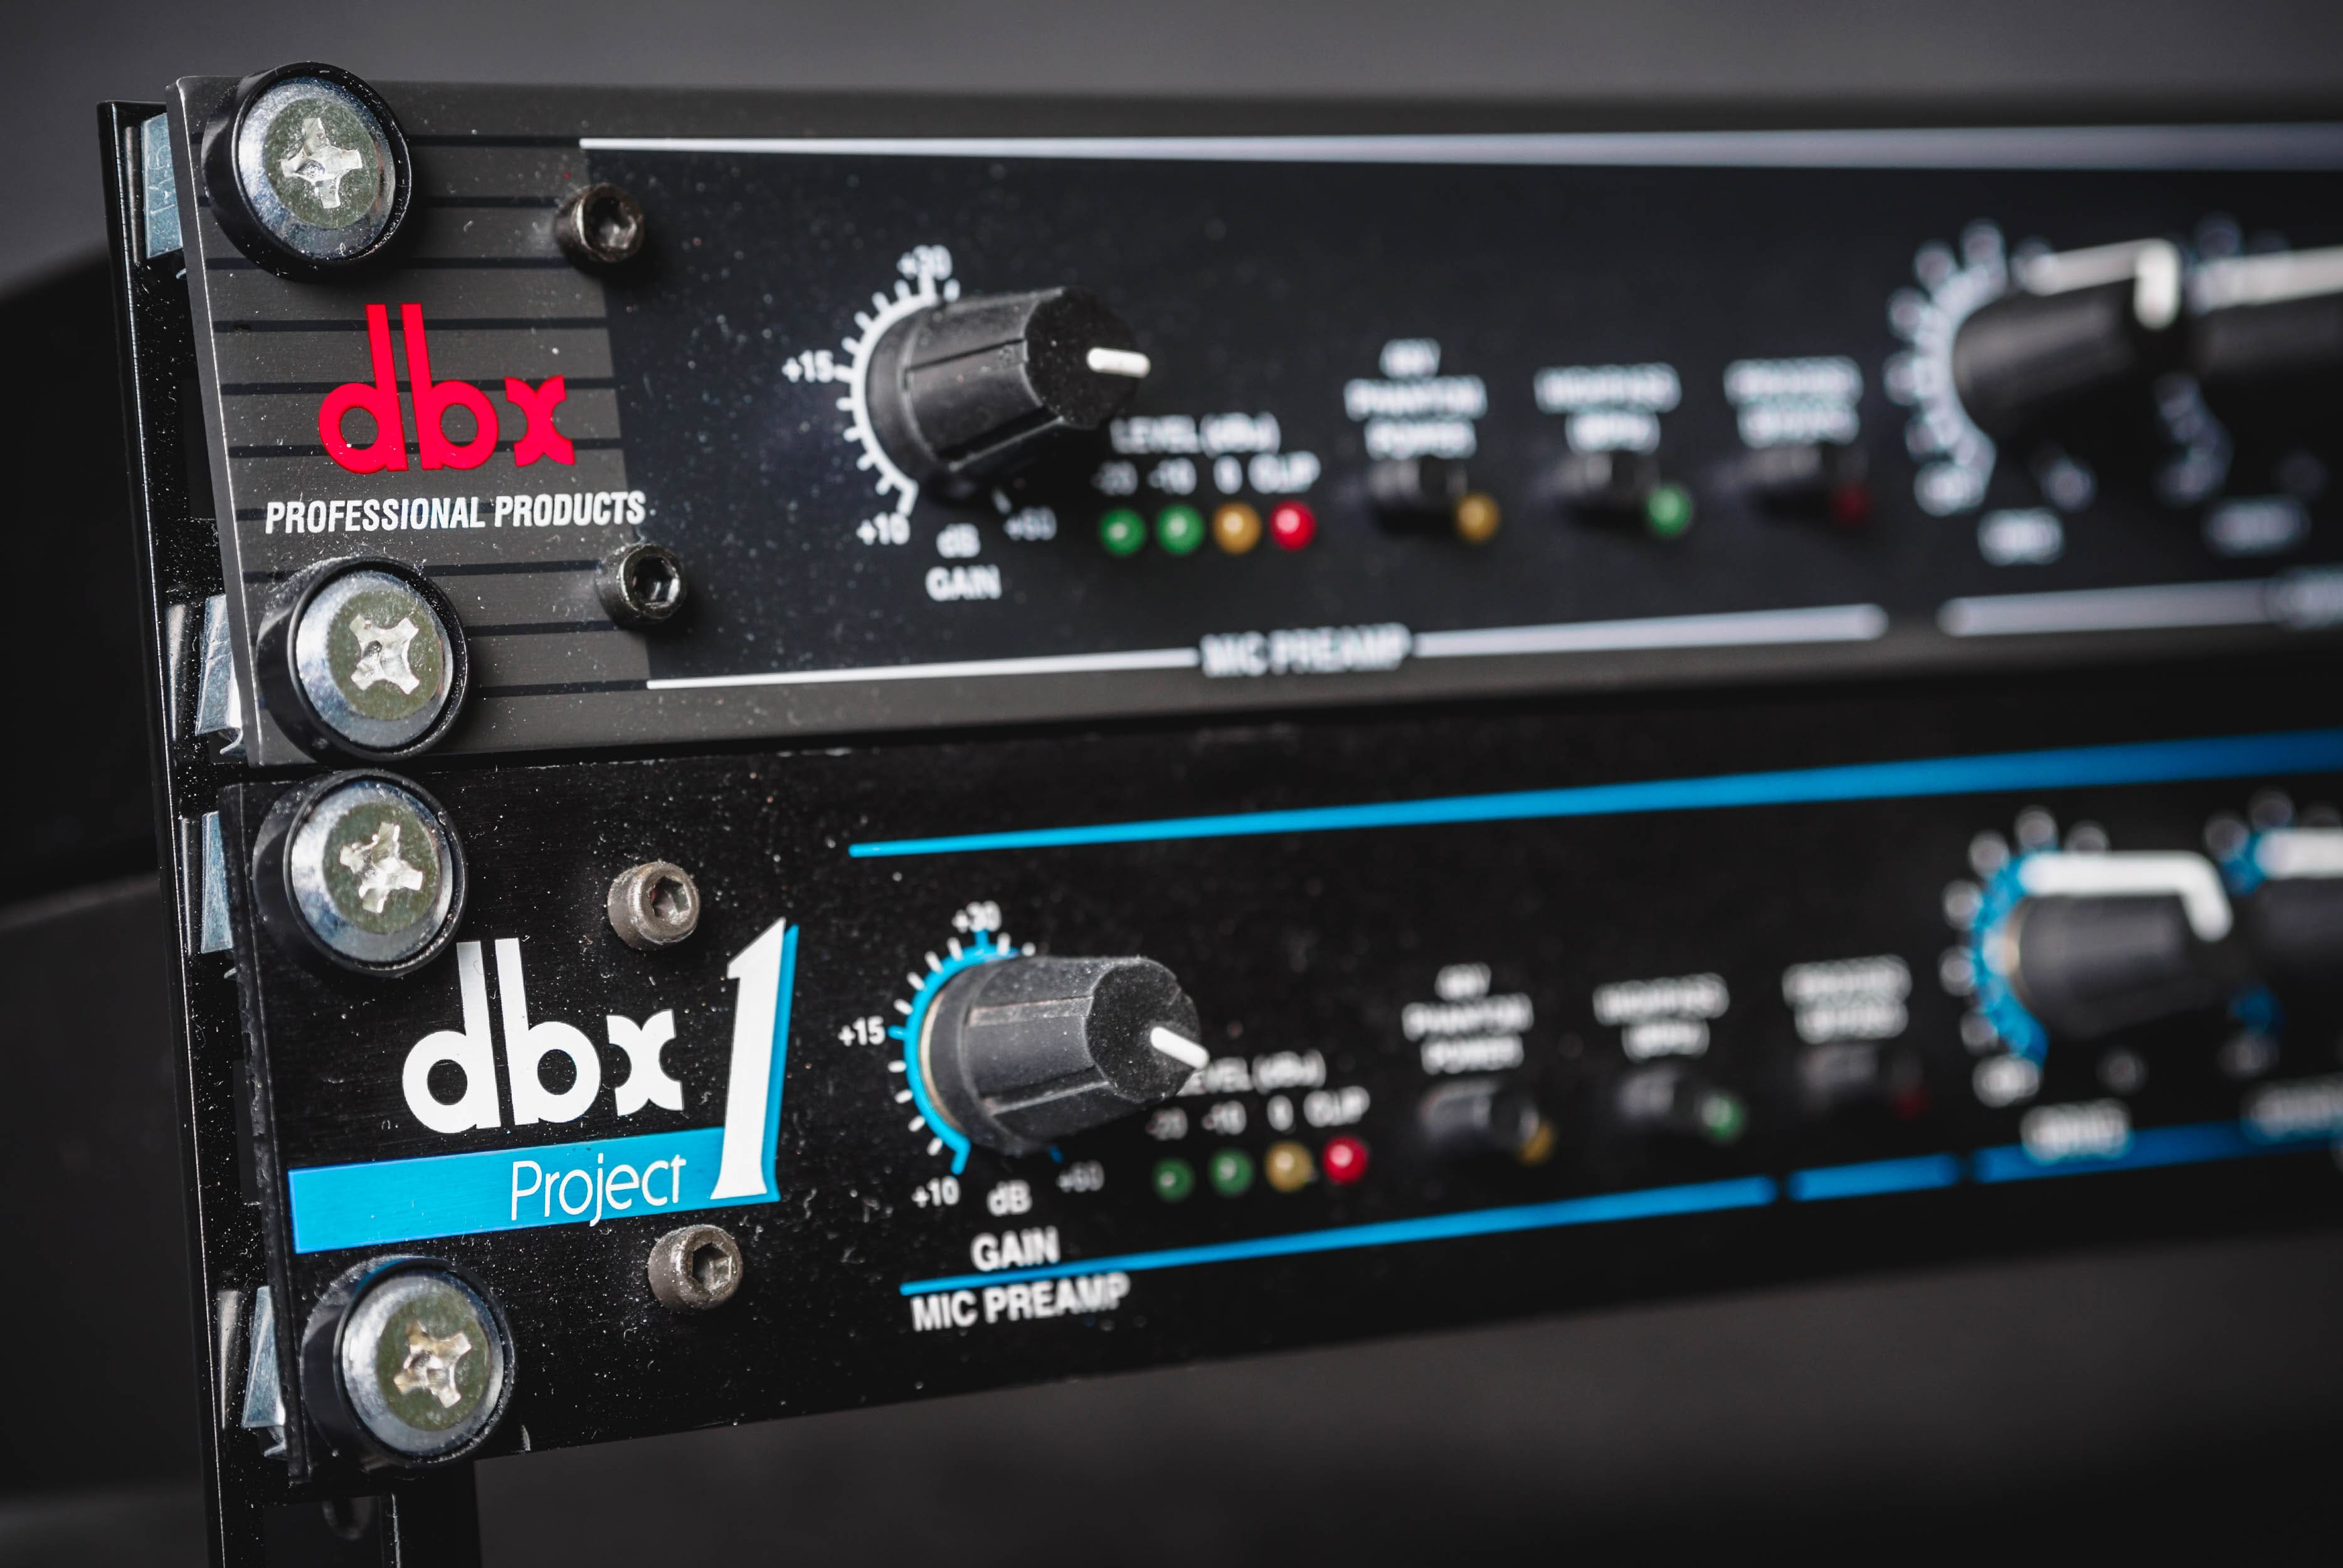
two dbx 286A, "Project 1" and... "regular" – And yes, I could've cleaned them for the photo
Some resources:
More Resources
Even with all the sections, there are still “miscellaneous” resources I want to mention:
- Episode 58 & 59 of The Podcasters’ Studio – Ray talks post production in general with Joe Glider
- Episode 101 of The Podcasters’ Studio – A guide on how to start a Podcast. Okay, you’re beyond that if you’ve made it here, but it’s a good reminder of what the basics are.
- I’m sorry to link my own post here. But if you’ve made it here you also might be interested in how podcasts could be made more accessible for listeners: What it Takes to Listen to a Podcast
Thanks
For many many small tips I received, or general contributios that motivated hobby/professional podcasters can benefit from a lot, I want to take this opportunity and thank these podcast aficionados/ podcasters/sound processing experts:
-
Jason Snell – I’ve bugged Jason via twitter several times, and he was always very nice and helpful. Before Forecast was public, I was able to hack together a script that generated podcast mp3s – something that only seamed feasible because I tweaked a script of Jason’s. If you do podcasting and hit a problem Jason has written about – maybe podcasting on iOS? – you’re definitely in luck!
All of Jason’s writing on podcasting. -
Ray Ortega – I have learned so much from the episodes of The Podcasters’ Studio I linked to in the sections above I almost can’t believe it. They’re an amazing start in their respective topics for sure. But they’re so dense that you can come back when you have the basics down and learn twice as much. Just an incredible resource.
In addition to that, Ray has always been very nice and helpful when I bugged him via twitter. -
Paul Figgiani – I hit Paul’s website while wandering the desert of loudness compliance confusion, and it was everything I had been looking for. He also tweets about new plugins or general developments in podcasting. And when I hit the enigma-like behavior of Logic’s limiter, he took the time to reproduce my setup and present me with the solution.
-
Marco – Well, Marco’s Podcast microphones Review is legendary by now. If this wasn’t enough, with the release of Forecast he gave all podcasters a really really amazing present. I almost forgot, he also is the developer of Overcast, many podcasters’ favorite iOS podcast app.
There are even more fellow podcasters that I had small, very helpful interactions with. I think it’s great that podcasting is to a large extent made up of people who want to help each other.
With this article, I try and do my part in making podcasting more accessible. Or at least in demistifying a higher production quality a bit.
My Podcast
If you want to hear what all of this know-how sounds like, give my podcast a listen (it’s German though): Die Sonne über Altona – as I write this, there are 42 episodes released. Naturally, I think the latest episode sounds the best.
If you’re wondering what our first episode sounded like, look no further. Quite a step up! I’ll even share the first podcas episode I ever did. One track, recorded on… an iPhone 4S I think.
Again, if you have any input or questions, please don’t hesitate and contact me.
Thank you so much for reading/skimming/being interested :) Cheers!